Using Genesis — User Guide
A walkthrough of the Genesis web app for annotators and project leads. No technical background needed — every step matches what you see on screen.
The big picture
Genesis lets a team turn plain text into annotated text: documents where words and phrases are marked up with linguistic information (who "he" refers to, which words are names of people or places, what part of speech each word is, which meaning of an ambiguous word is intended).

A typical journey from signing up to exporting finished annotations:

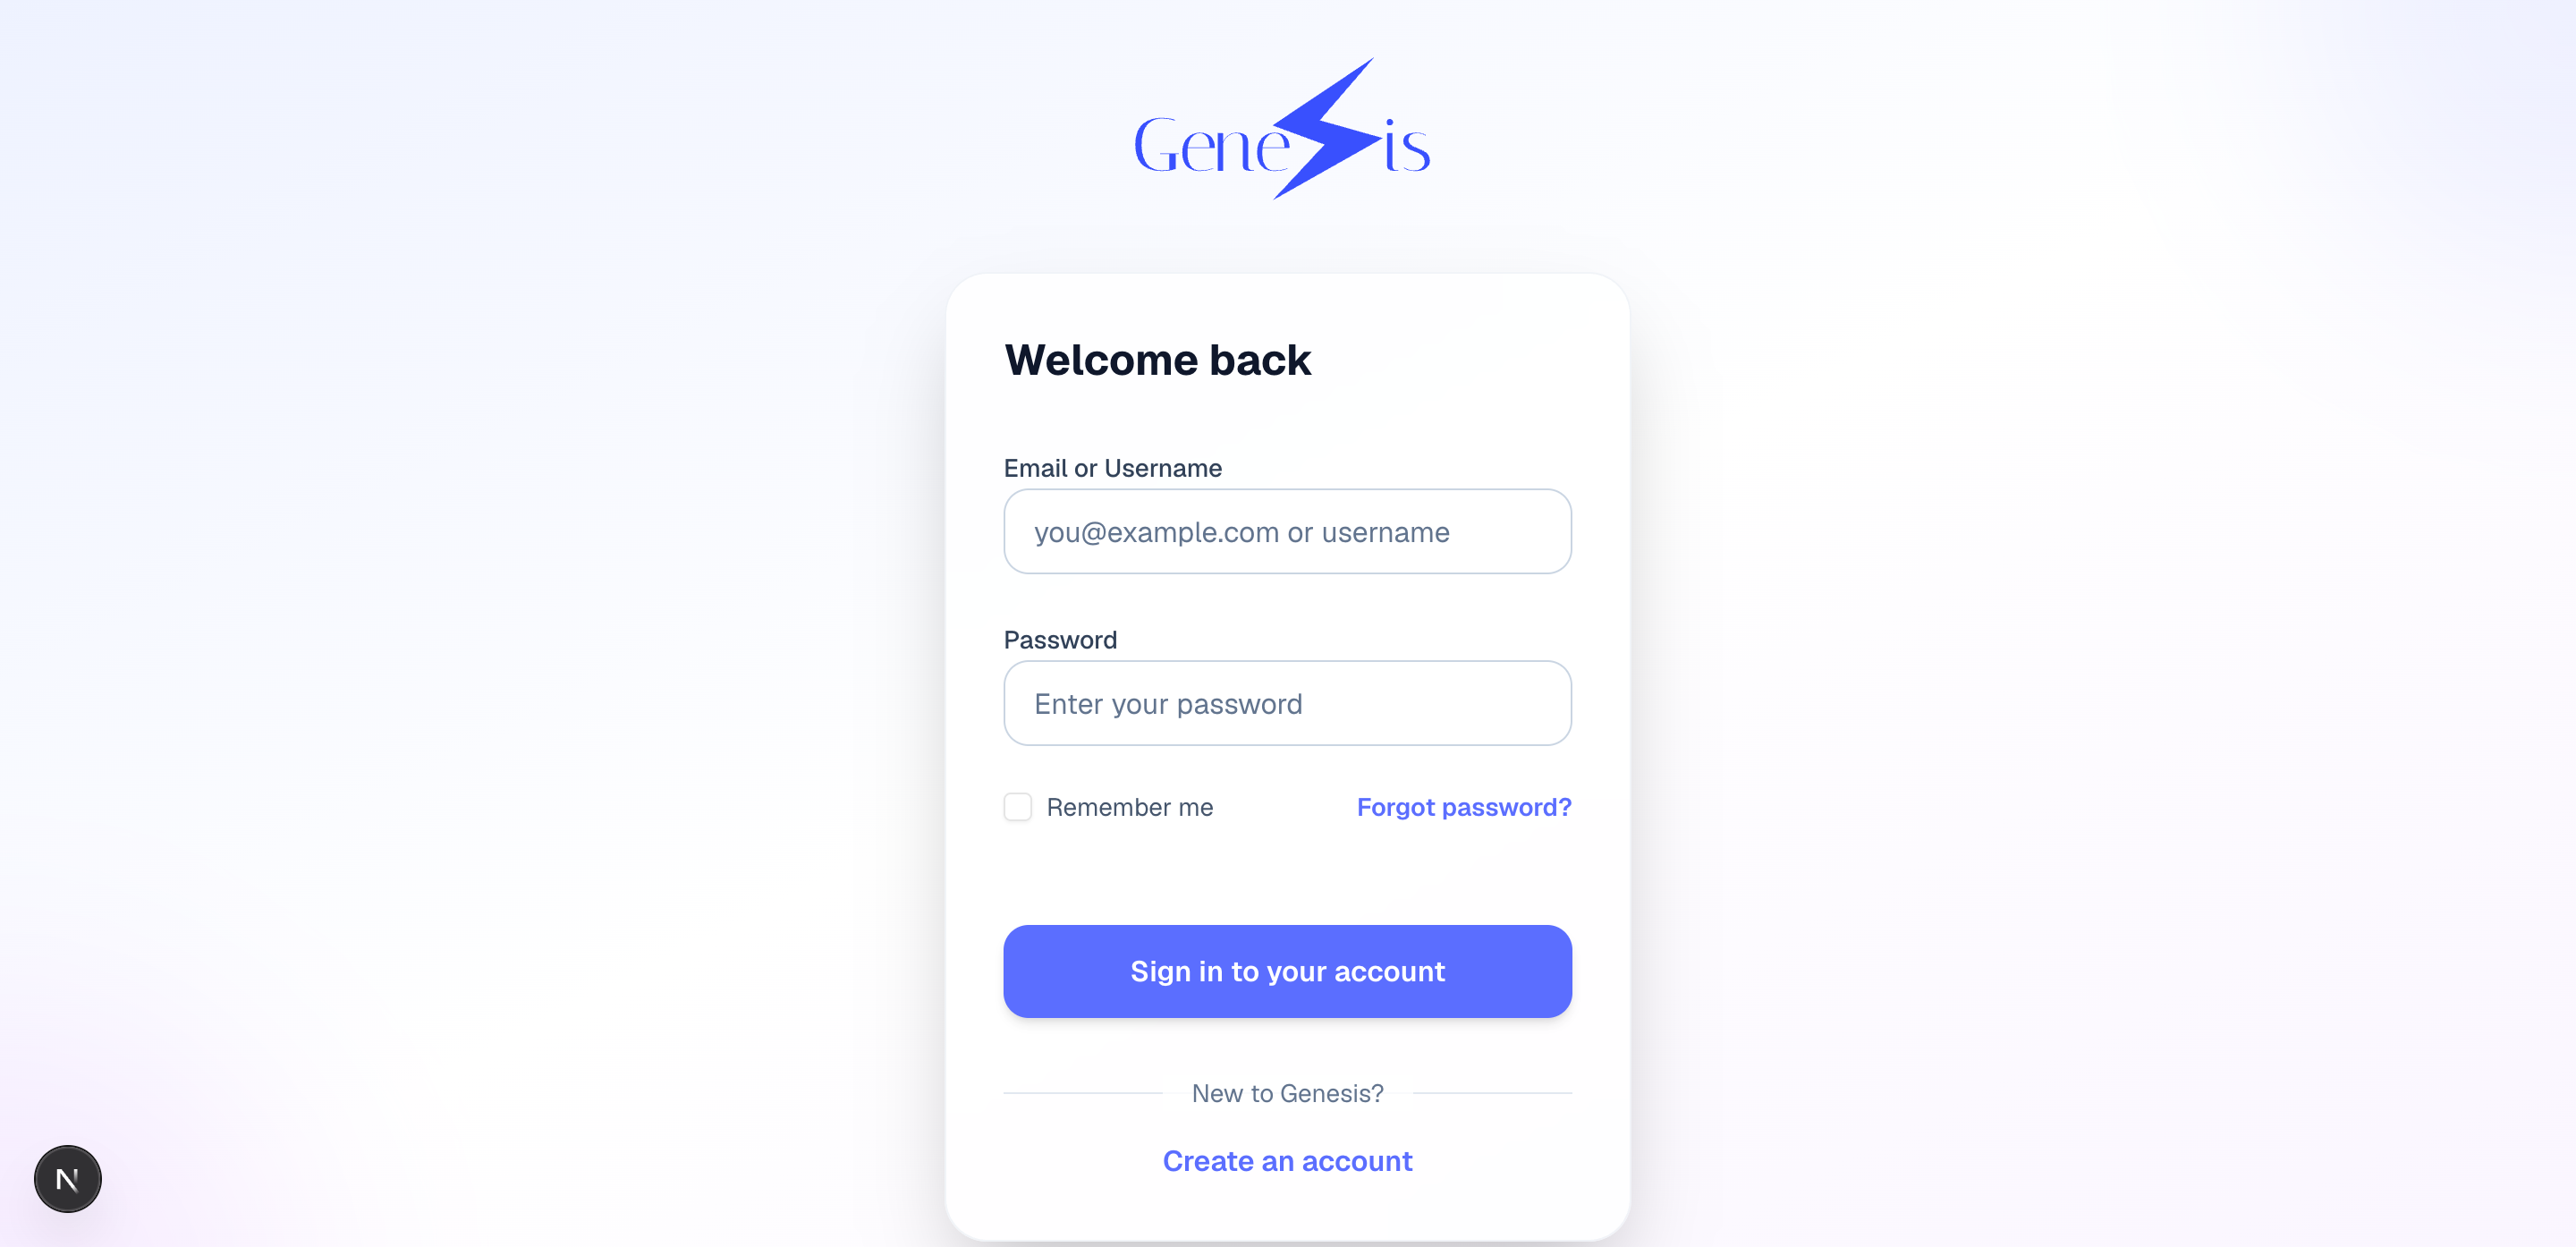
1. Create an account and sign in
Open the Genesis URL your administrator gave you.
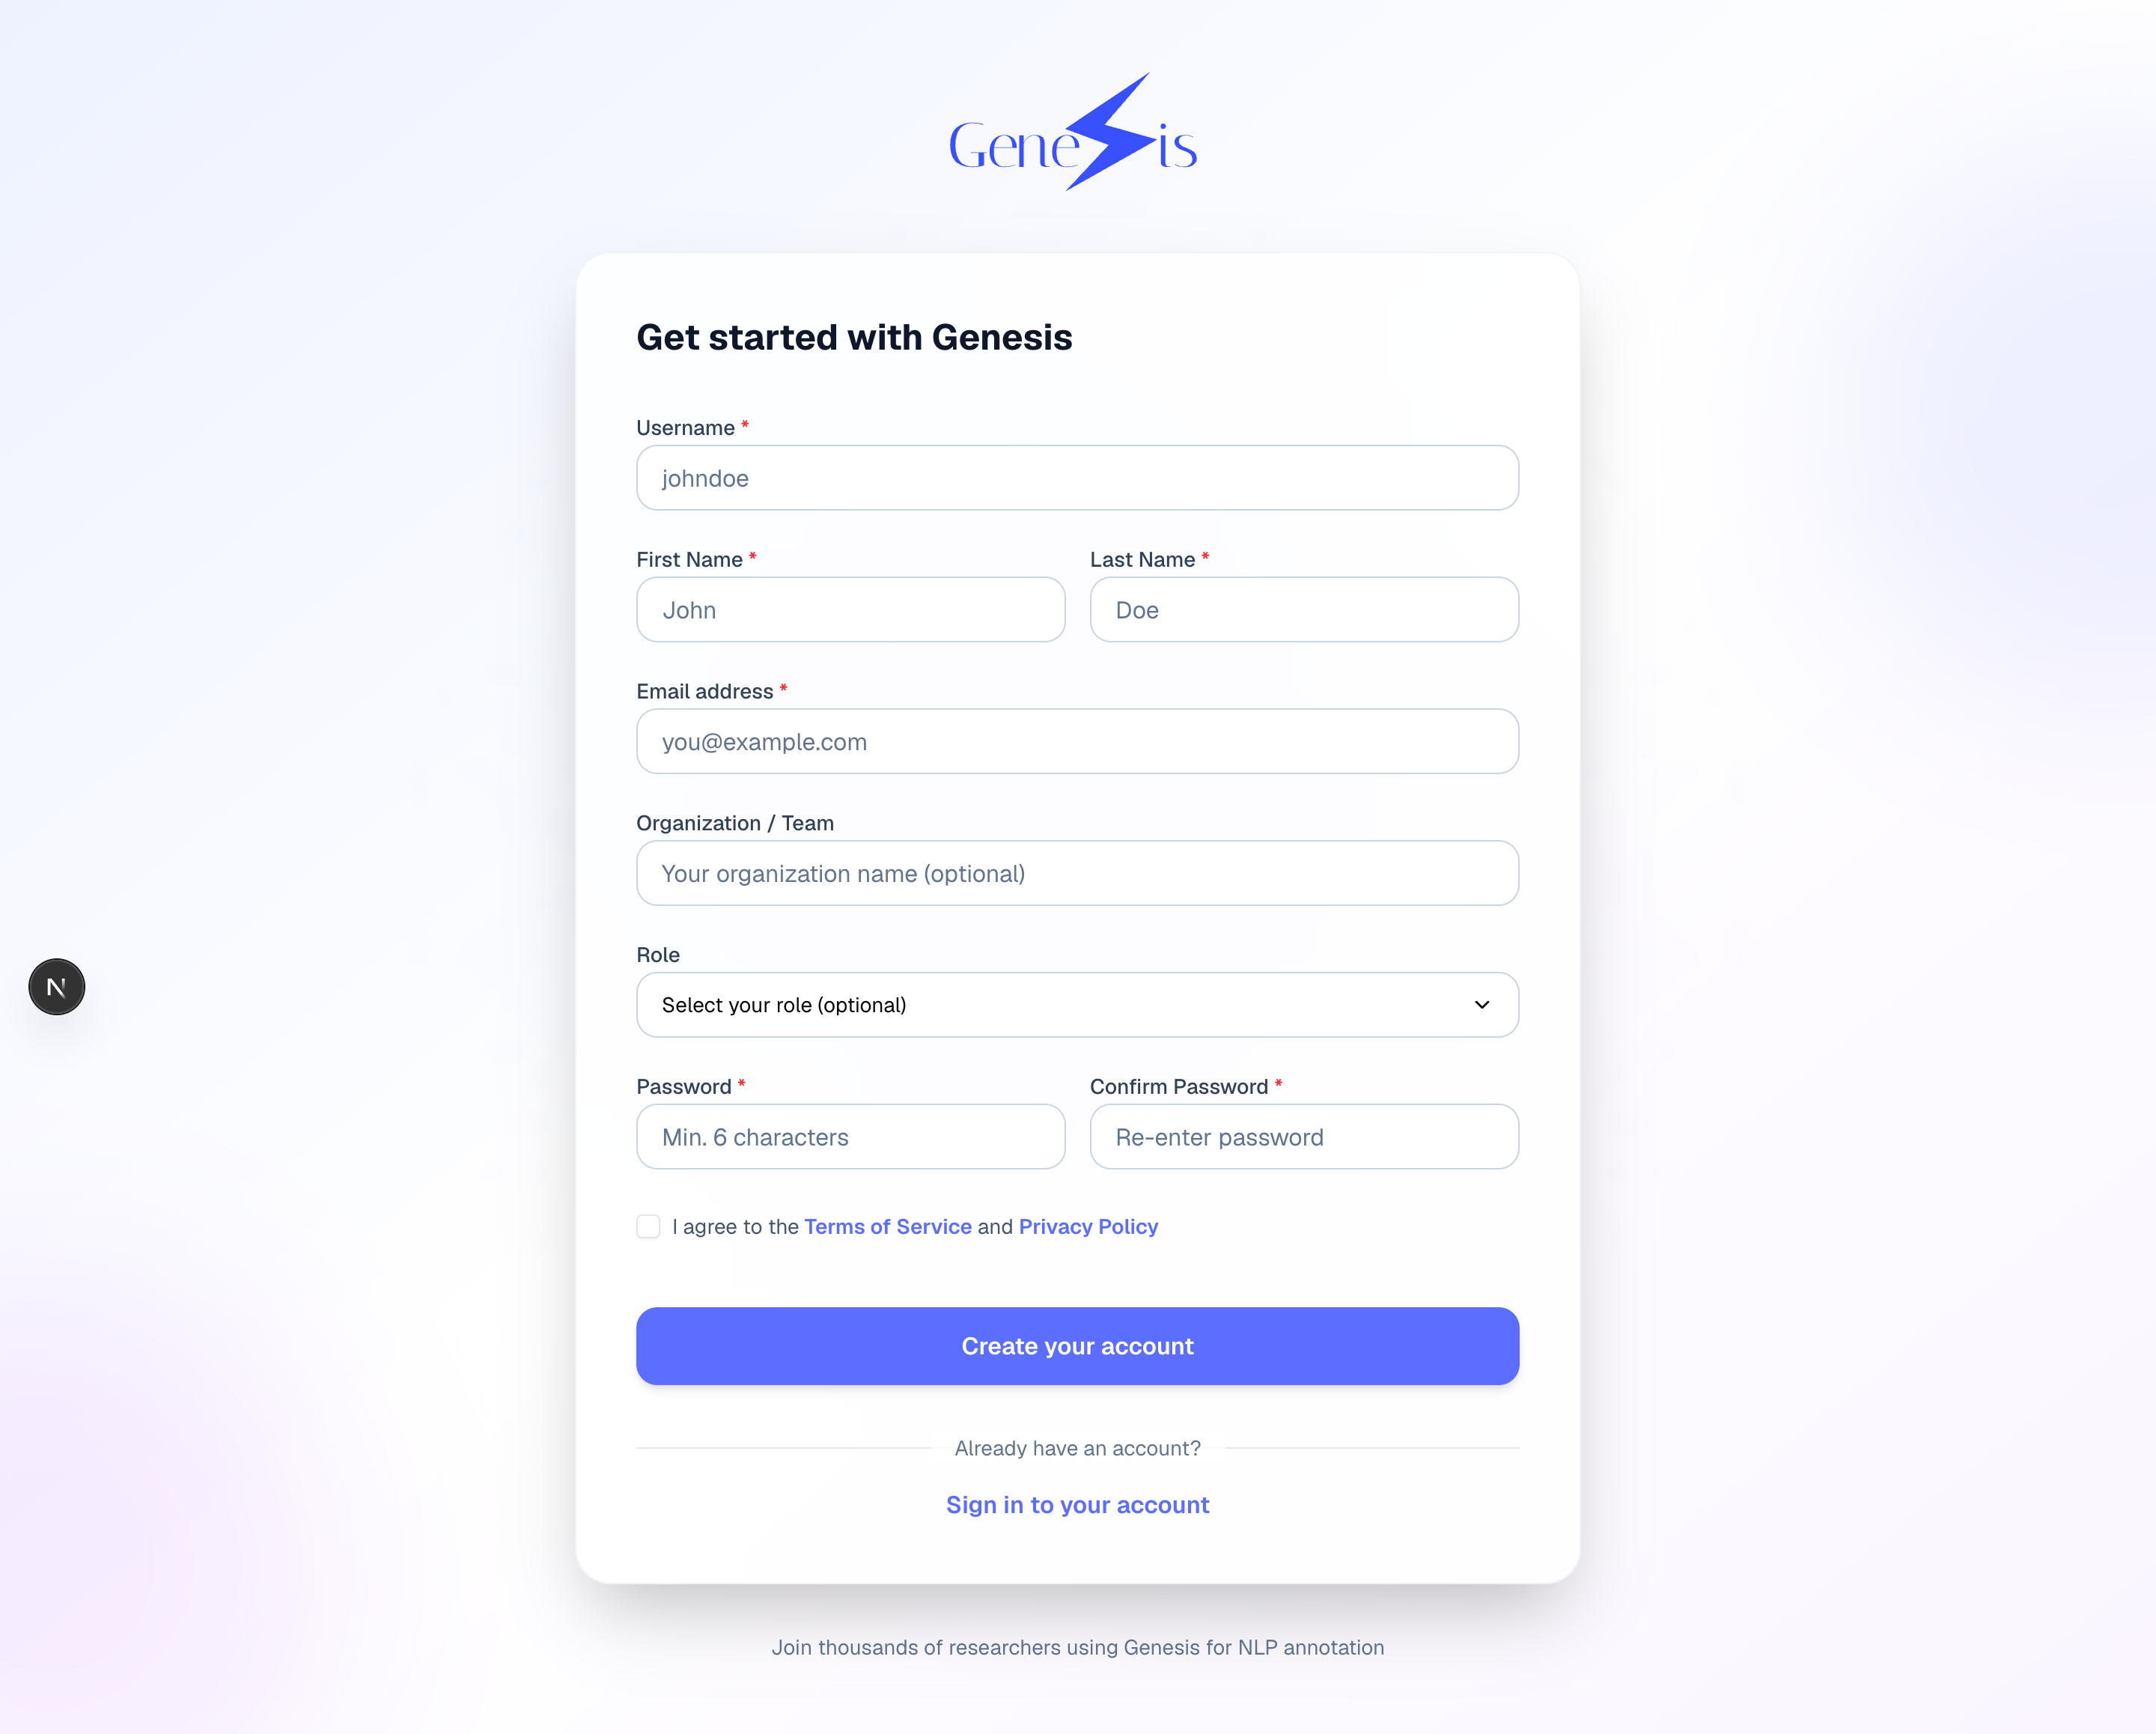
Fill in your name, email, and a password, then sign in:
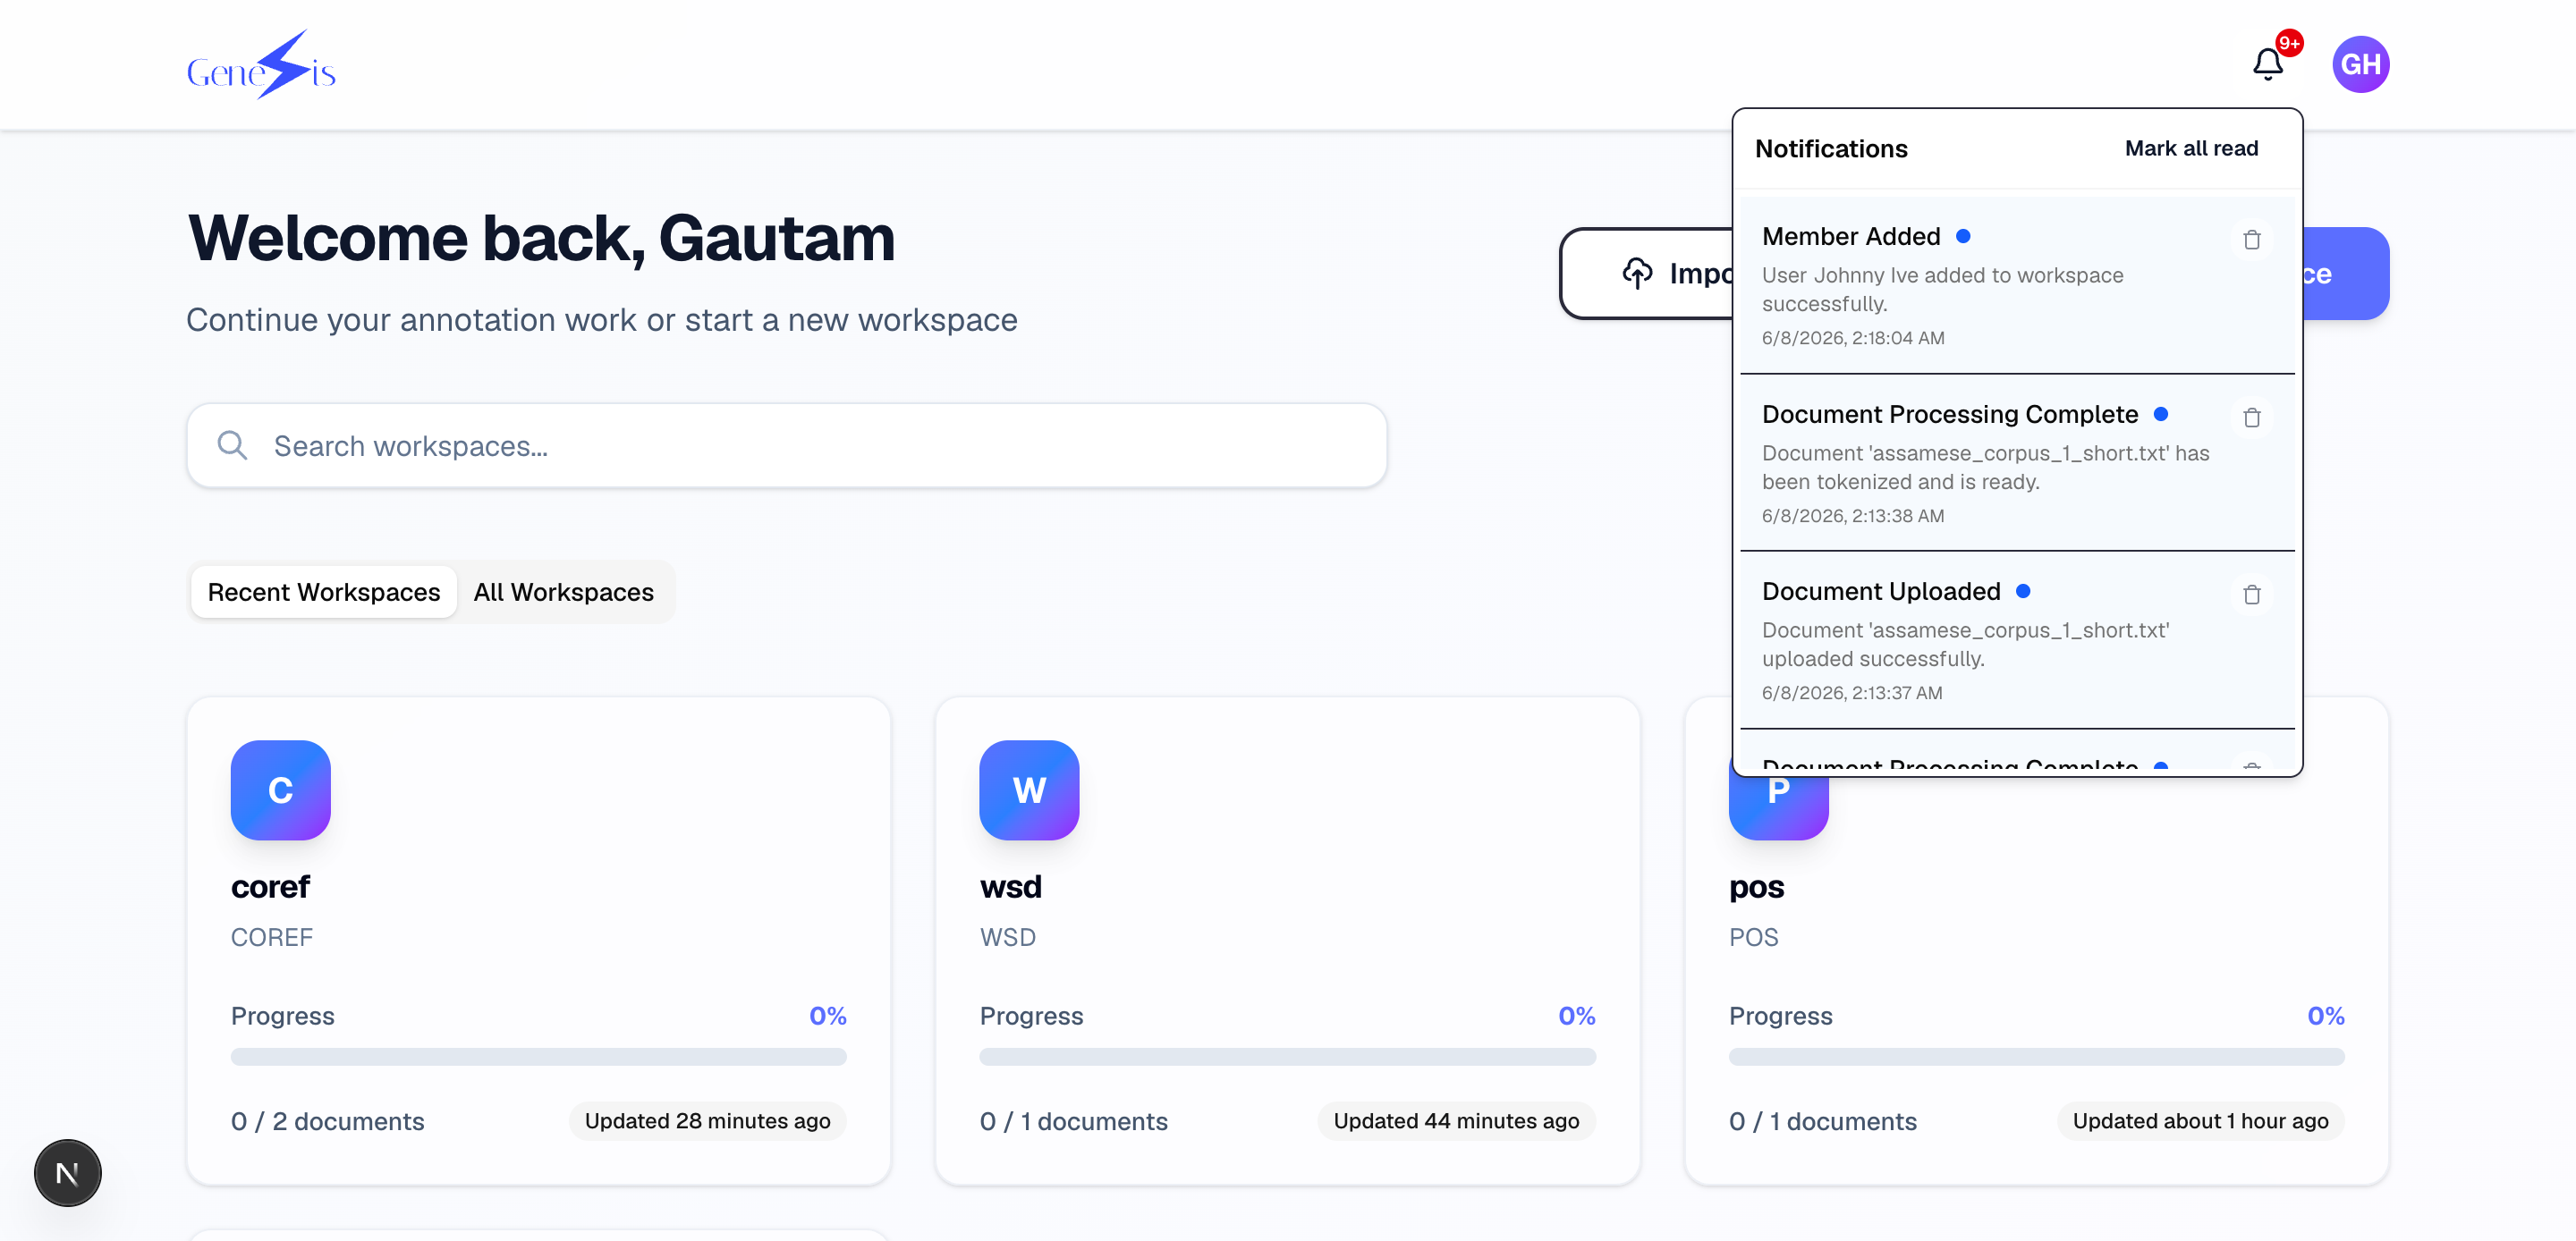
2. Home — your workspaces
After signing in you land on Home. Each card is a workspace: one annotation project with its own documents, team, and annotation type.
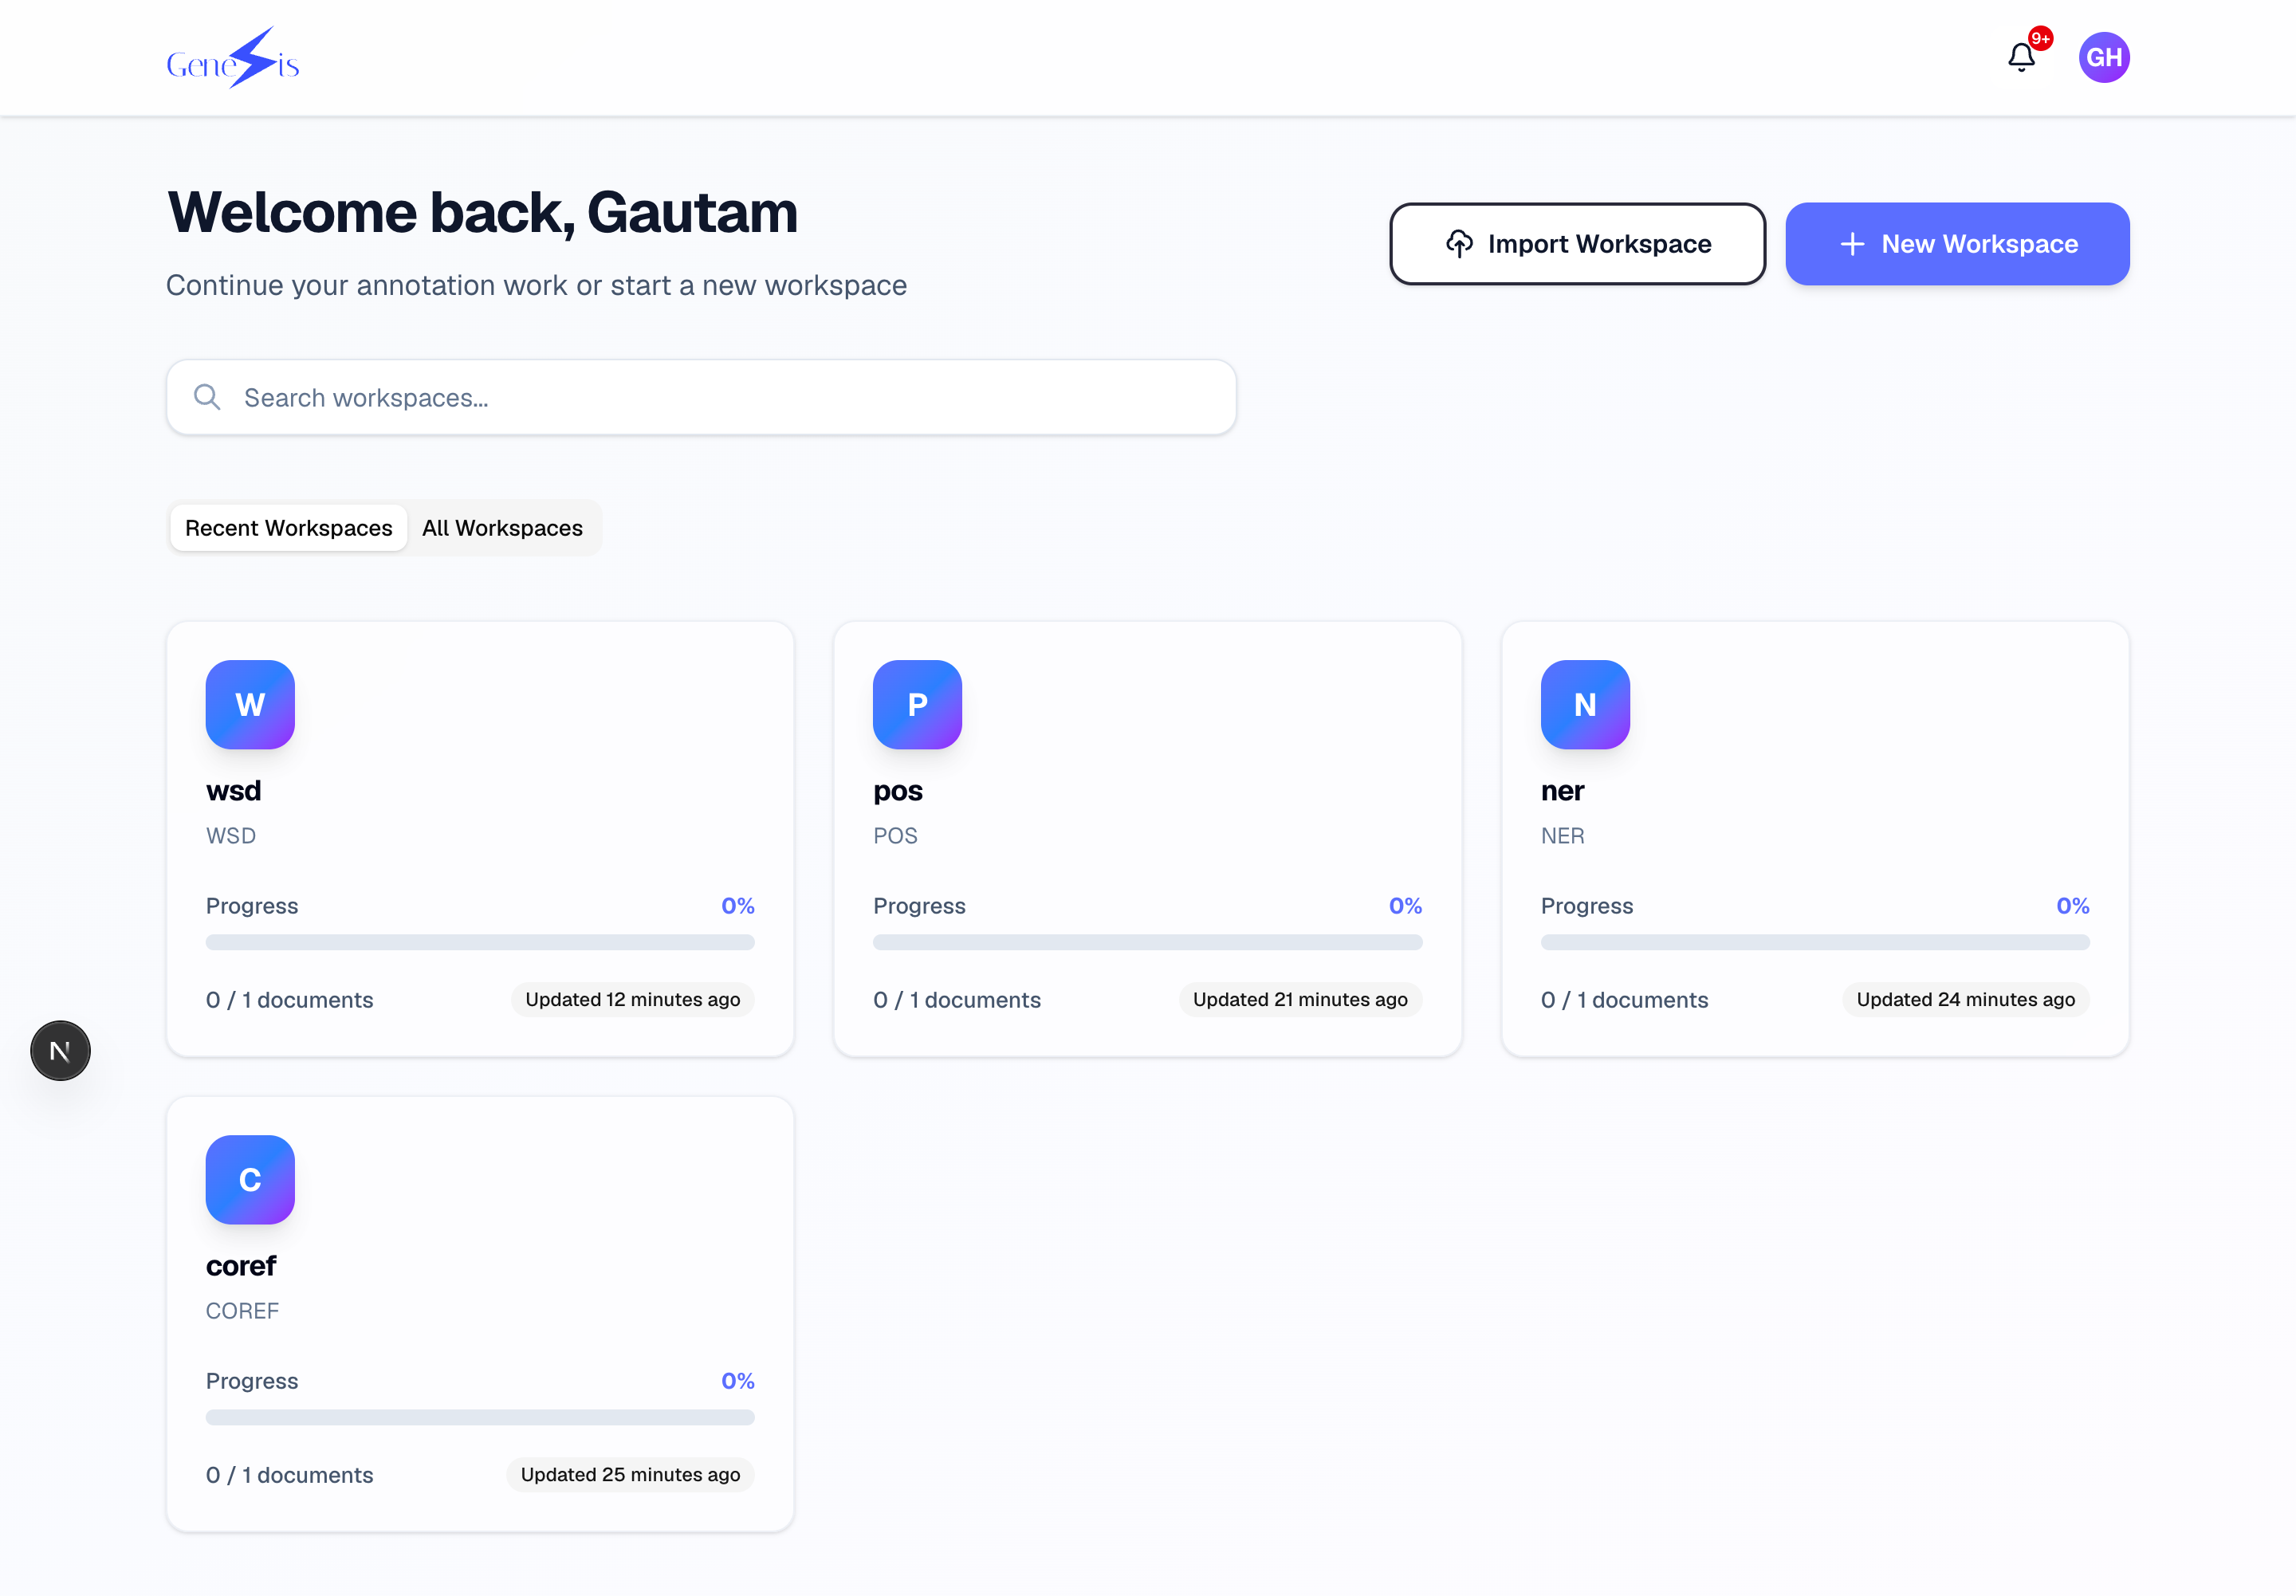
To start a project, click Create Workspace, give it a name, and choose the annotation type — this choice decides which editor the workspace uses and cannot be changed later:
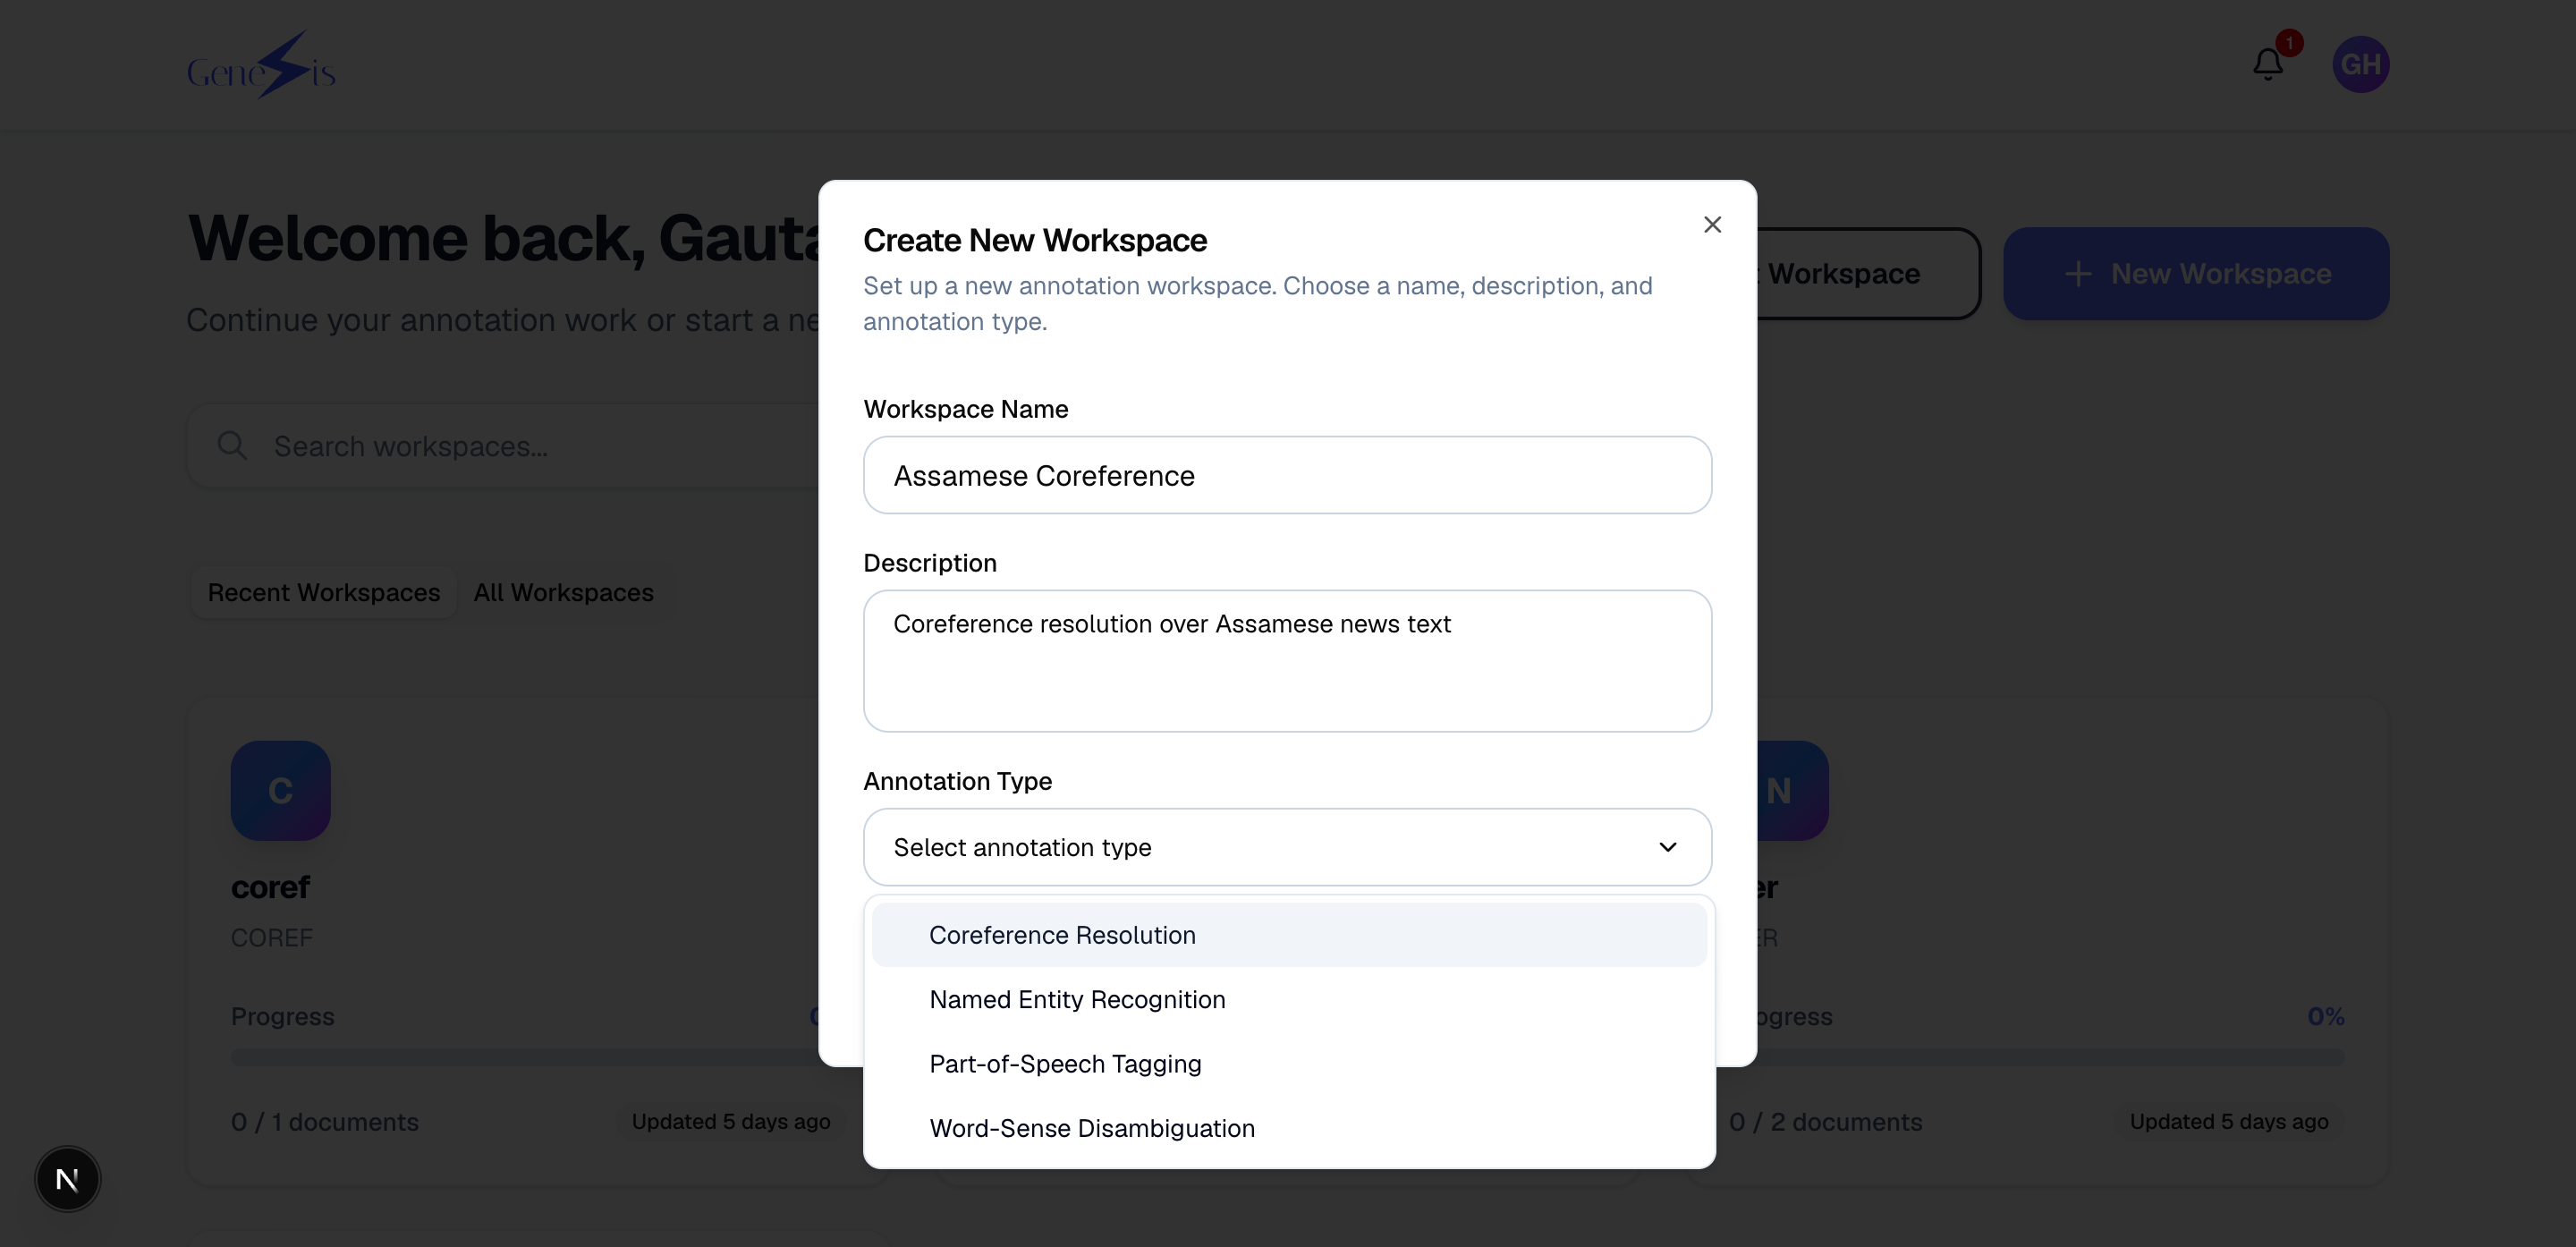
| Type | You will be marking… |
|---|---|
| Coreference | which mentions refer to the same thing ("Maria… she… the doctor") |
| NER | names of people, places, organisations, etc. |
| POS | the part of speech of every word (noun, verb, …) |
| WSD | which sense of an ambiguous word is meant |
3. Inside a workspace
The workspace page is the project hub — documents, team, and exports:
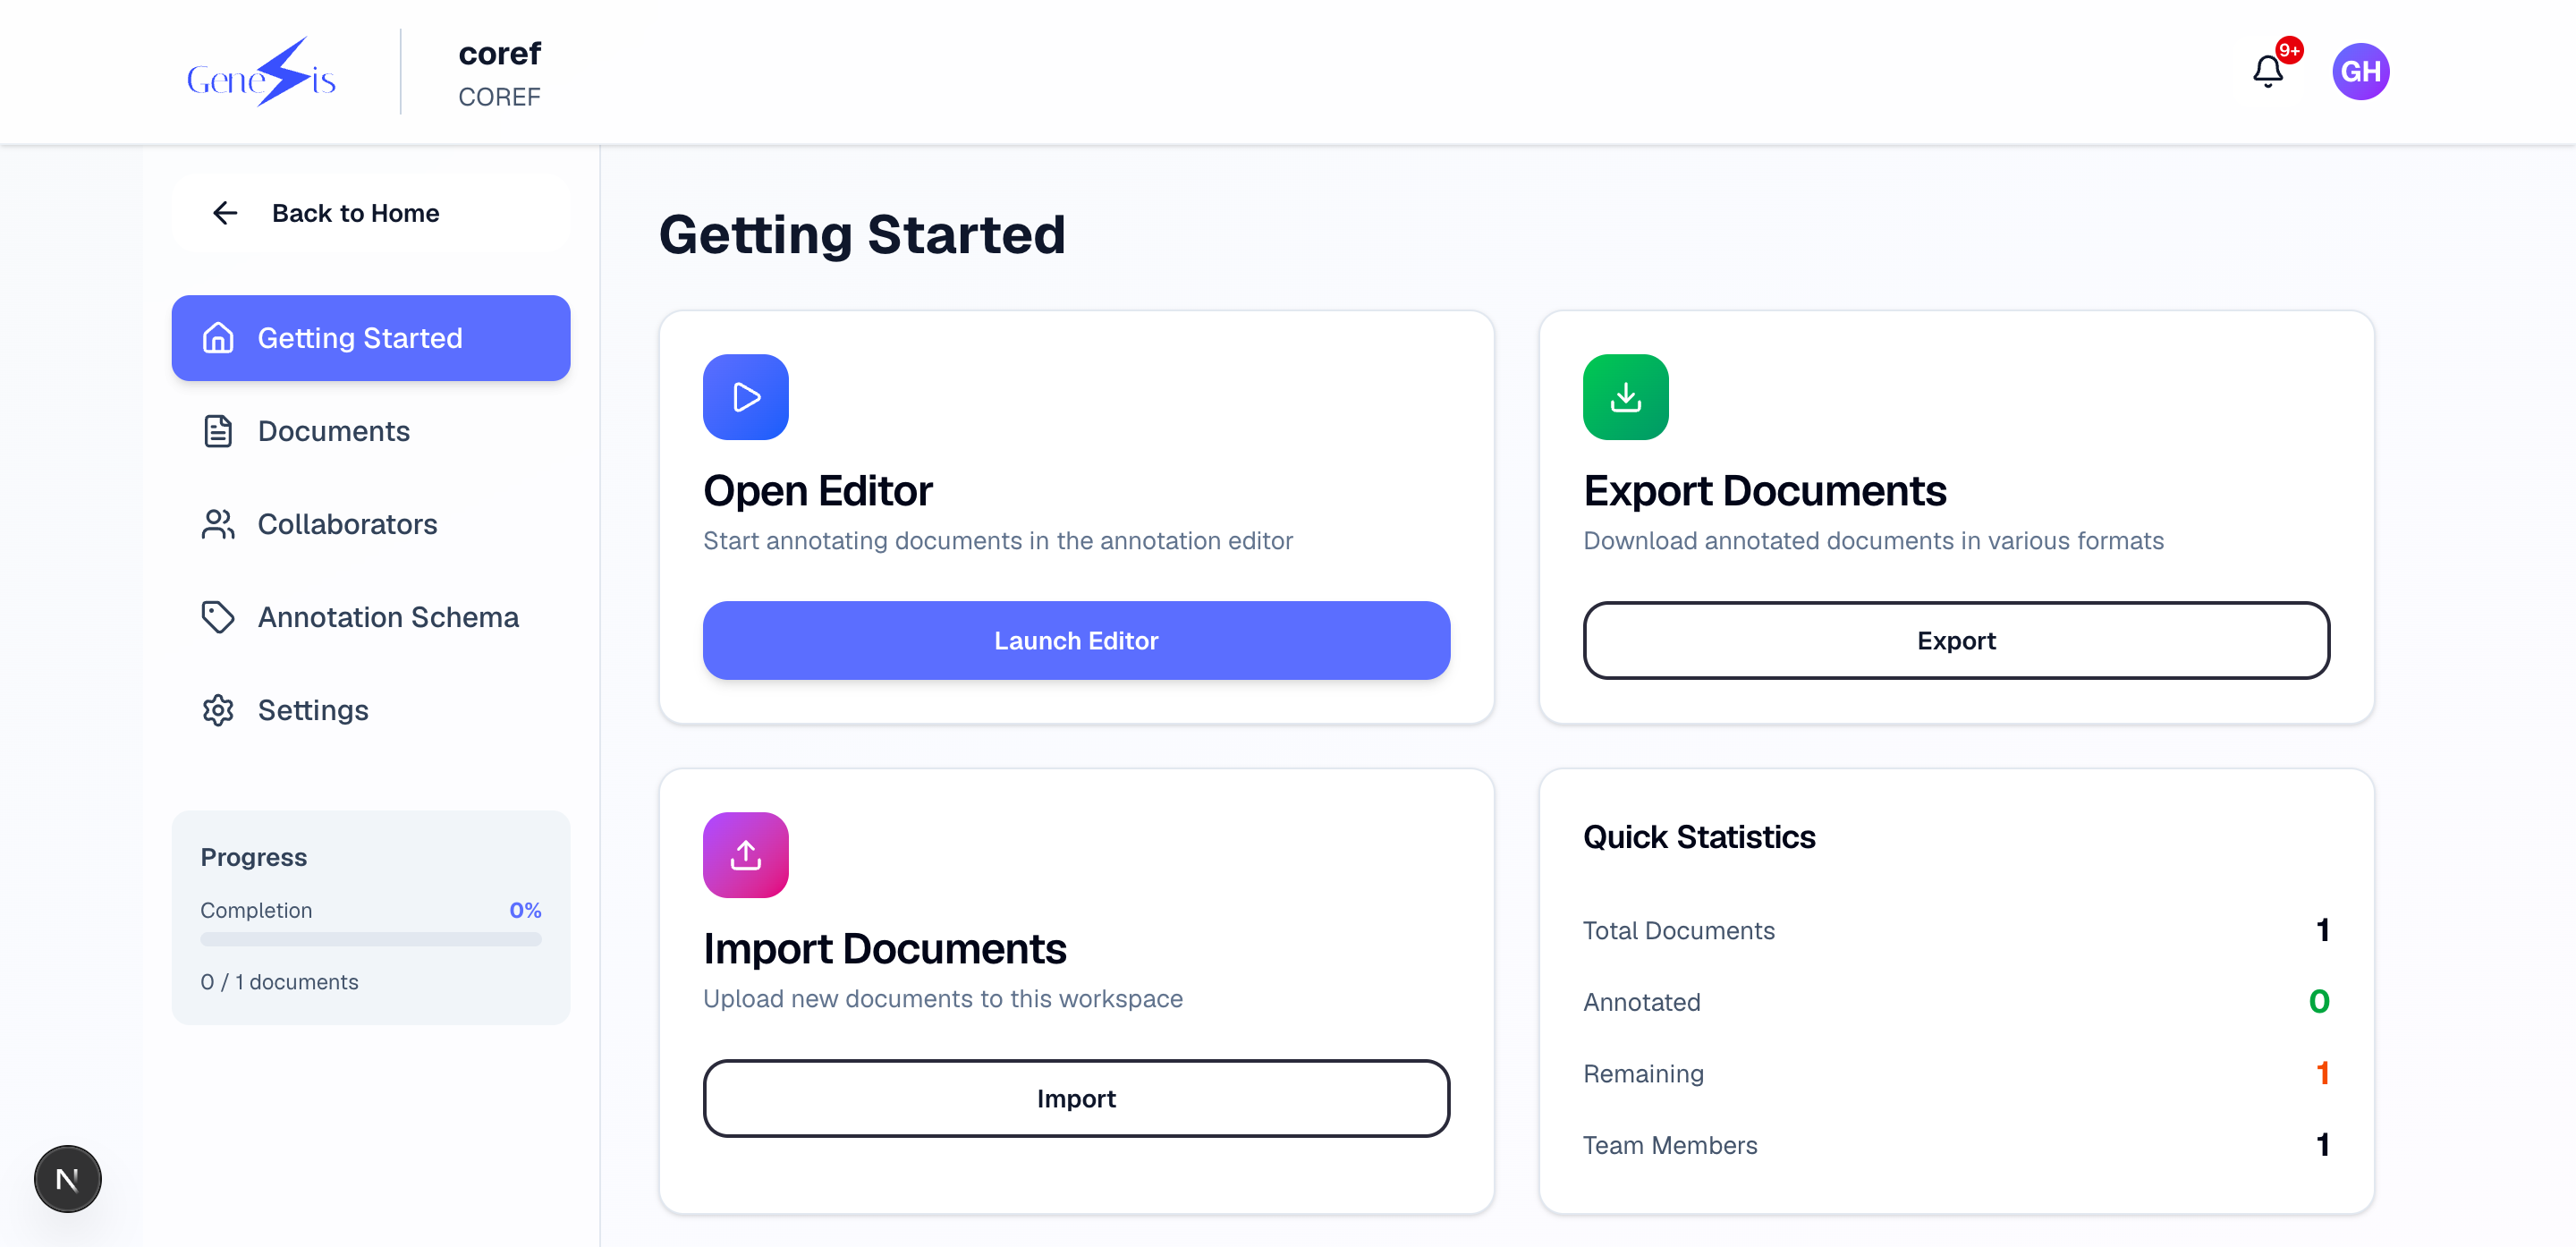
Upload documents with the import button. Plain text (.txt) files work
for fresh annotation; CoNLL-2012 files bring existing annotations with
them. After upload, Genesis splits the text into sentences and words
automatically (you'll get a notification when it's ready).
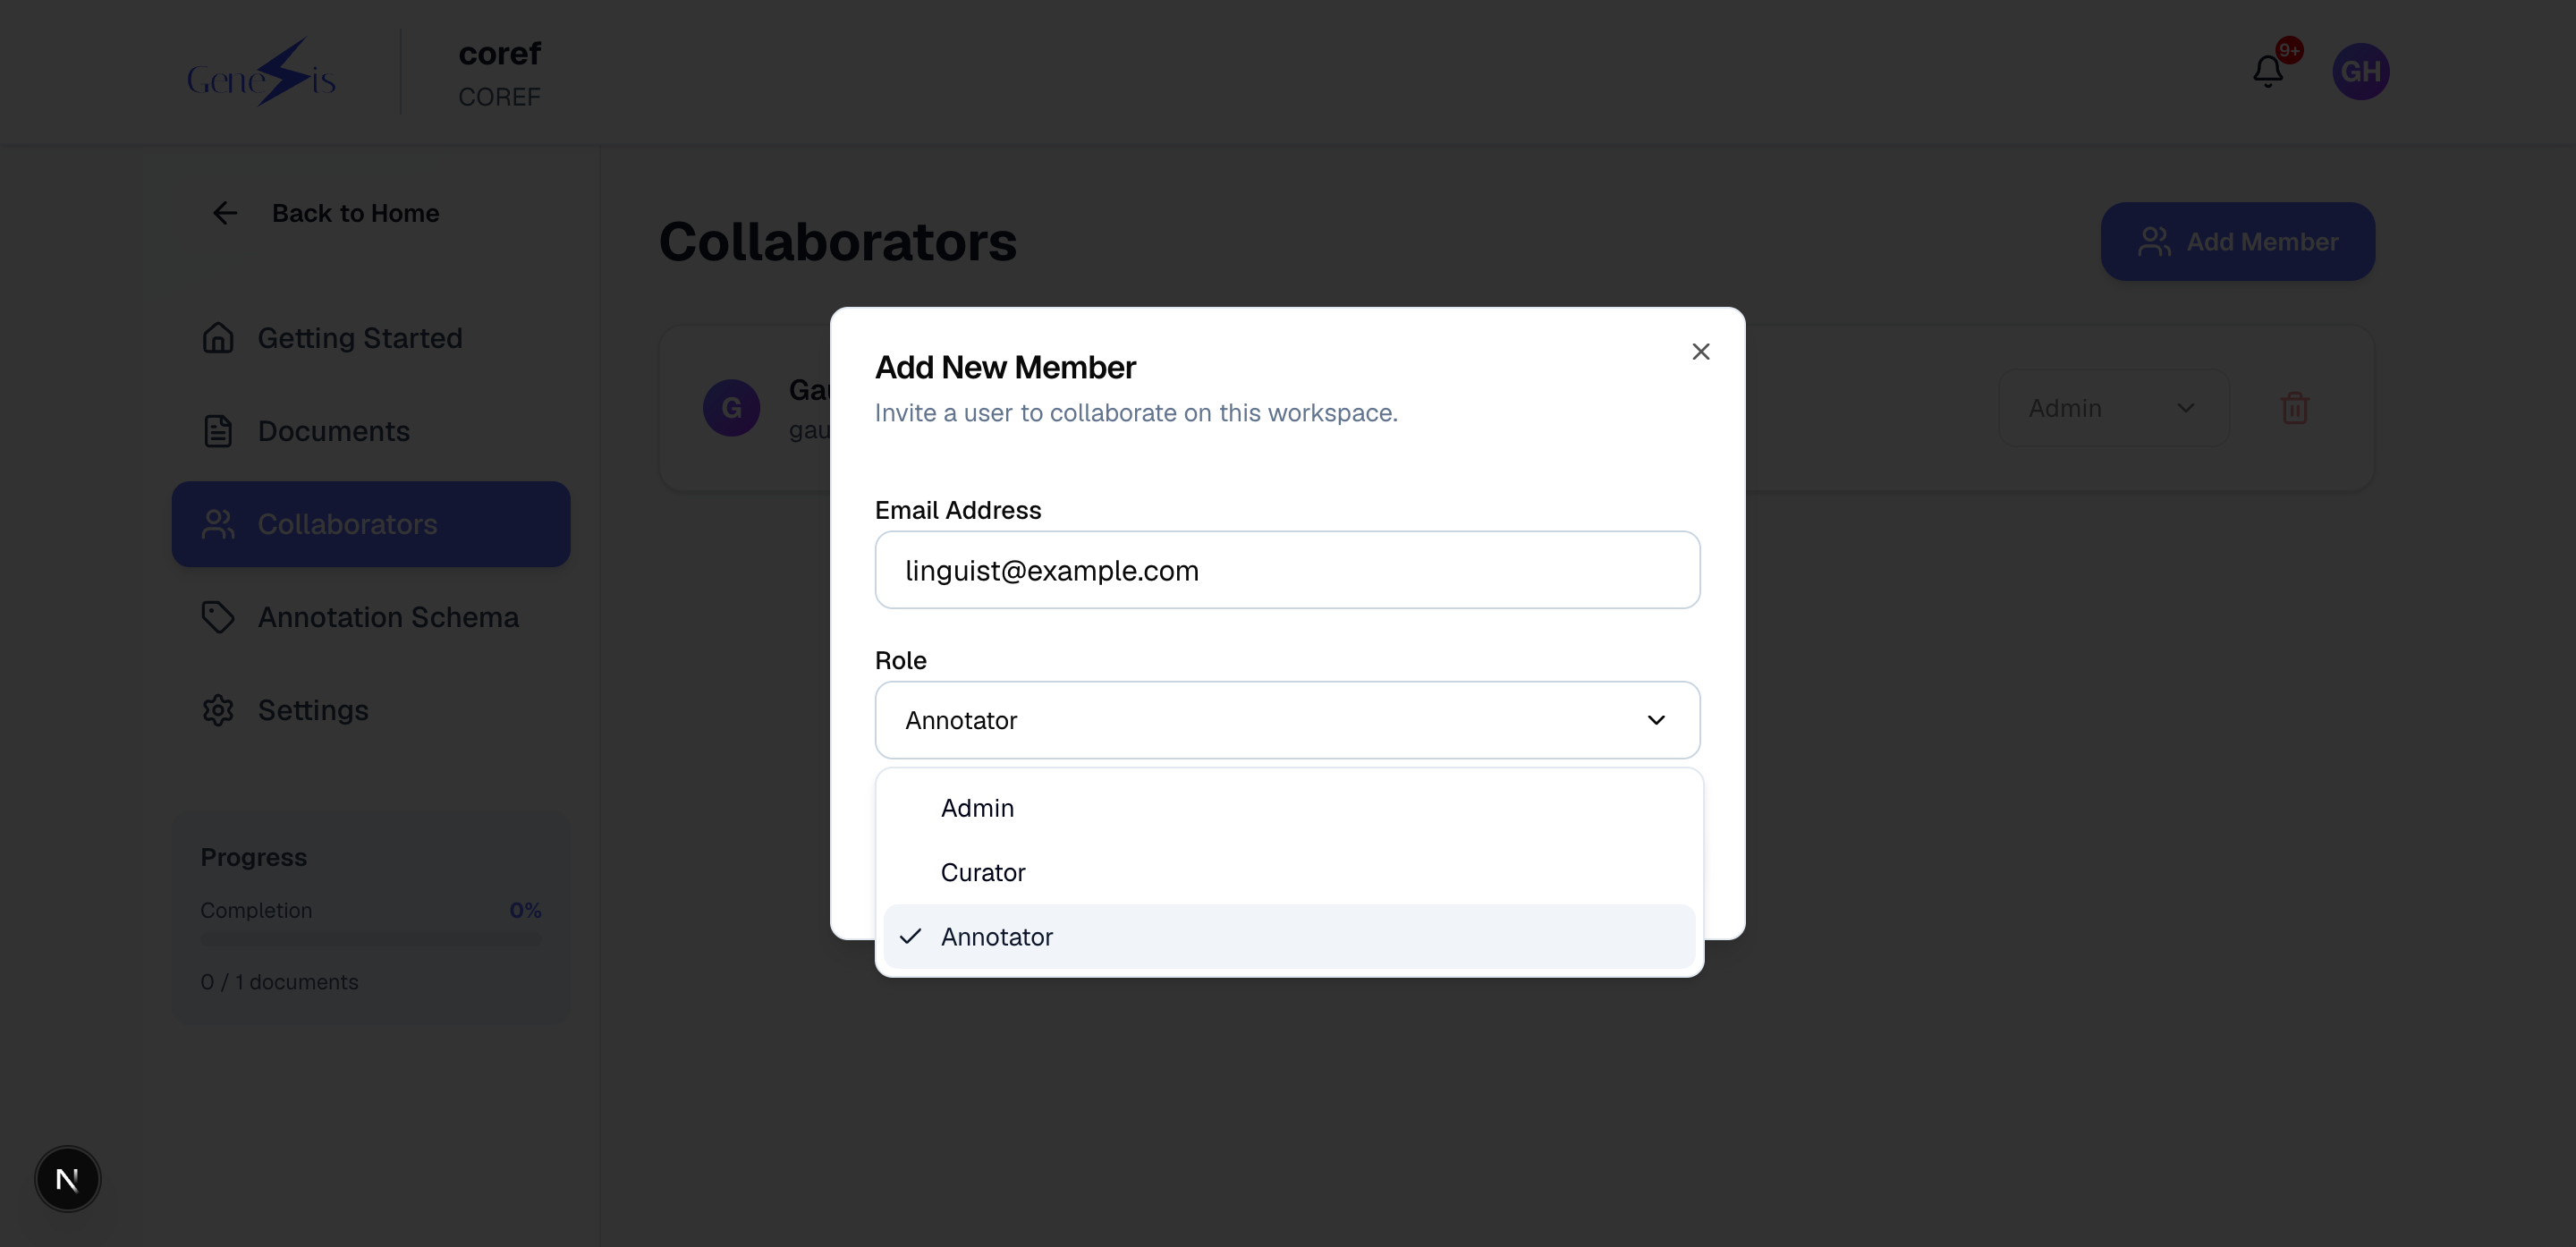
Invite your team from the members panel. Members can annotate; the owner also manages documents and the team. You can also share a join link:
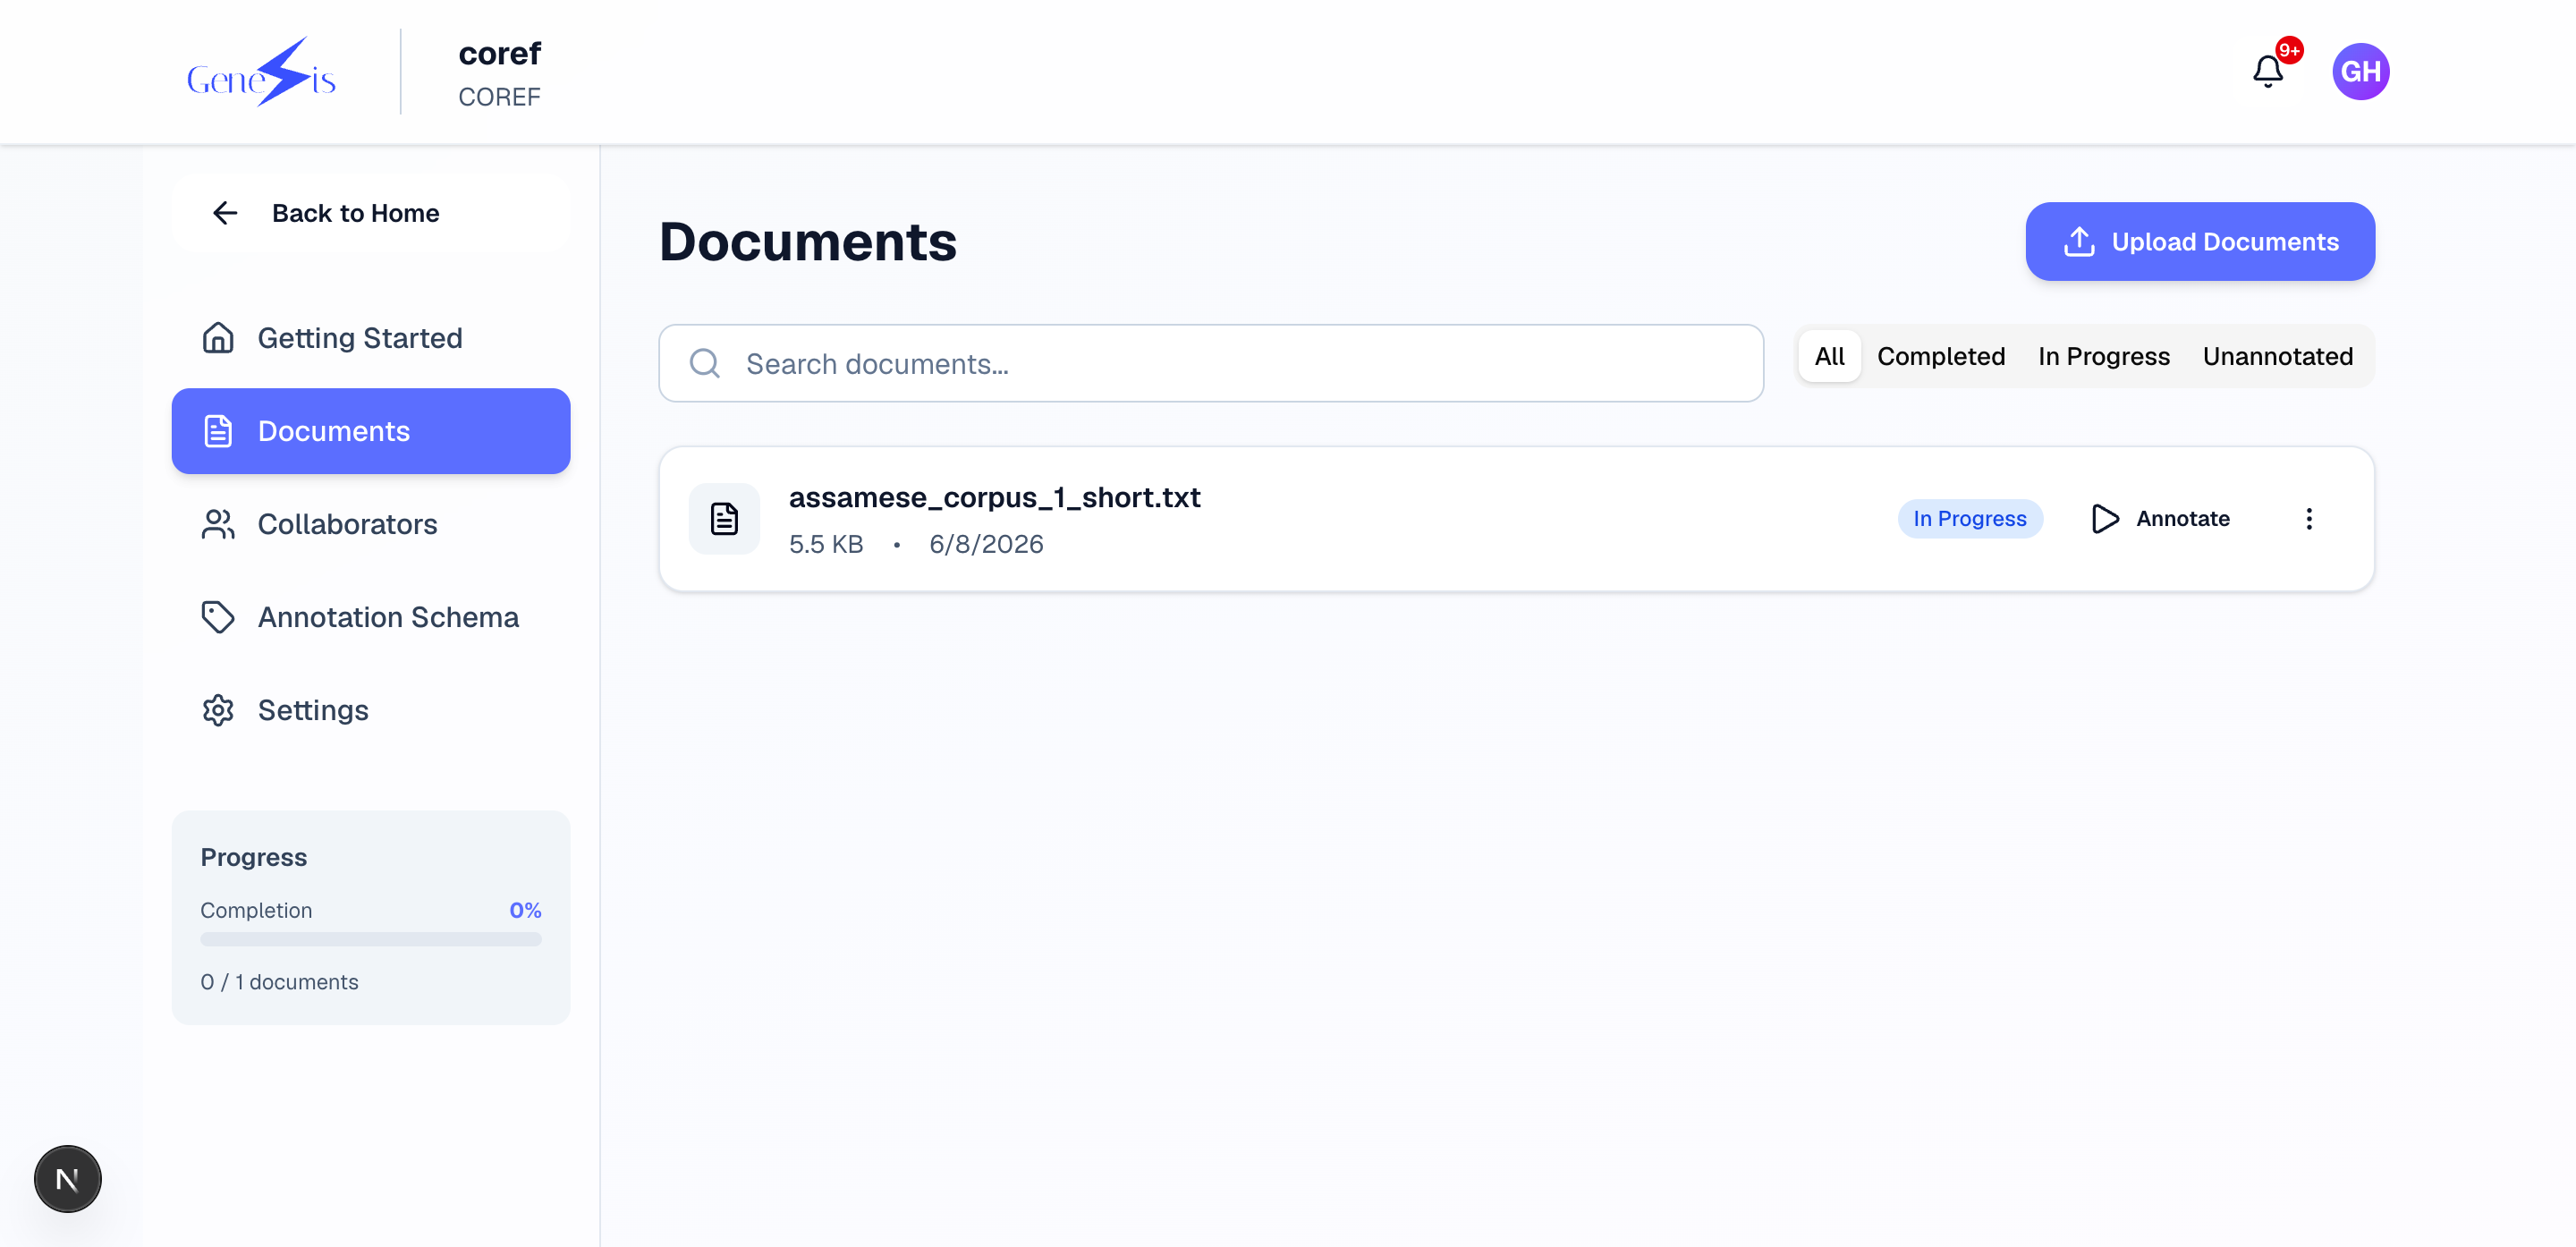
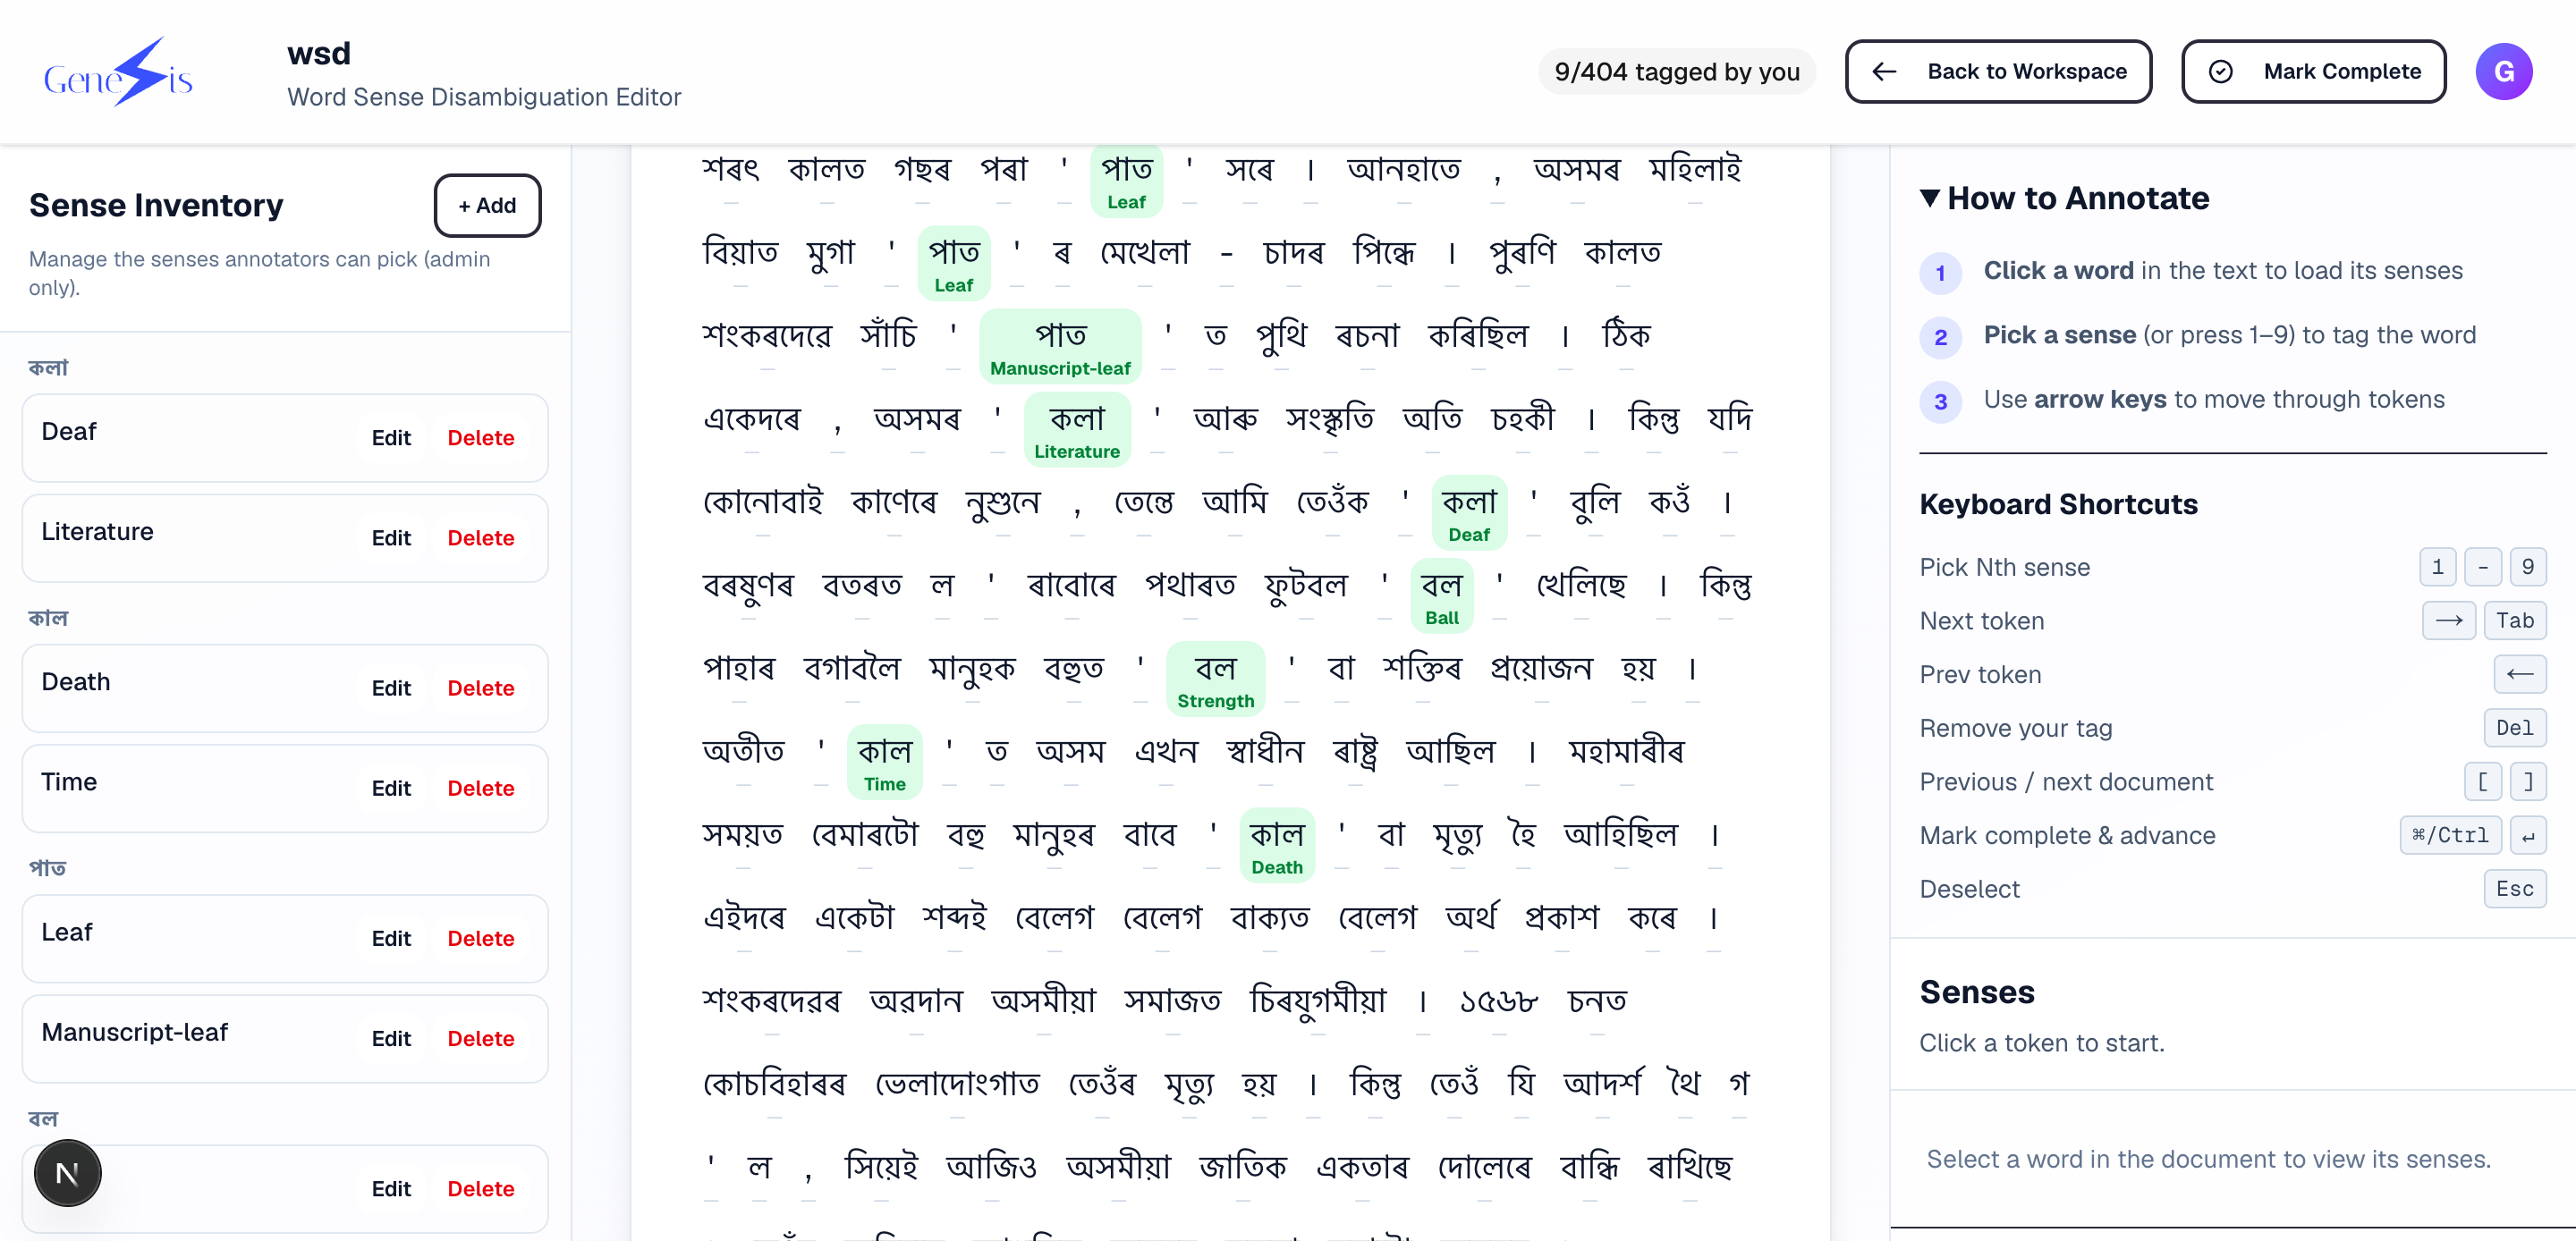
4. Annotating
Open a document and the editor for your workspace type appears. All editors share the same basics: the text is shown word by word, long documents load as you scroll, and your position is remembered — close the tab and you'll resume exactly where you stopped. A help panel lists every keyboard shortcut.
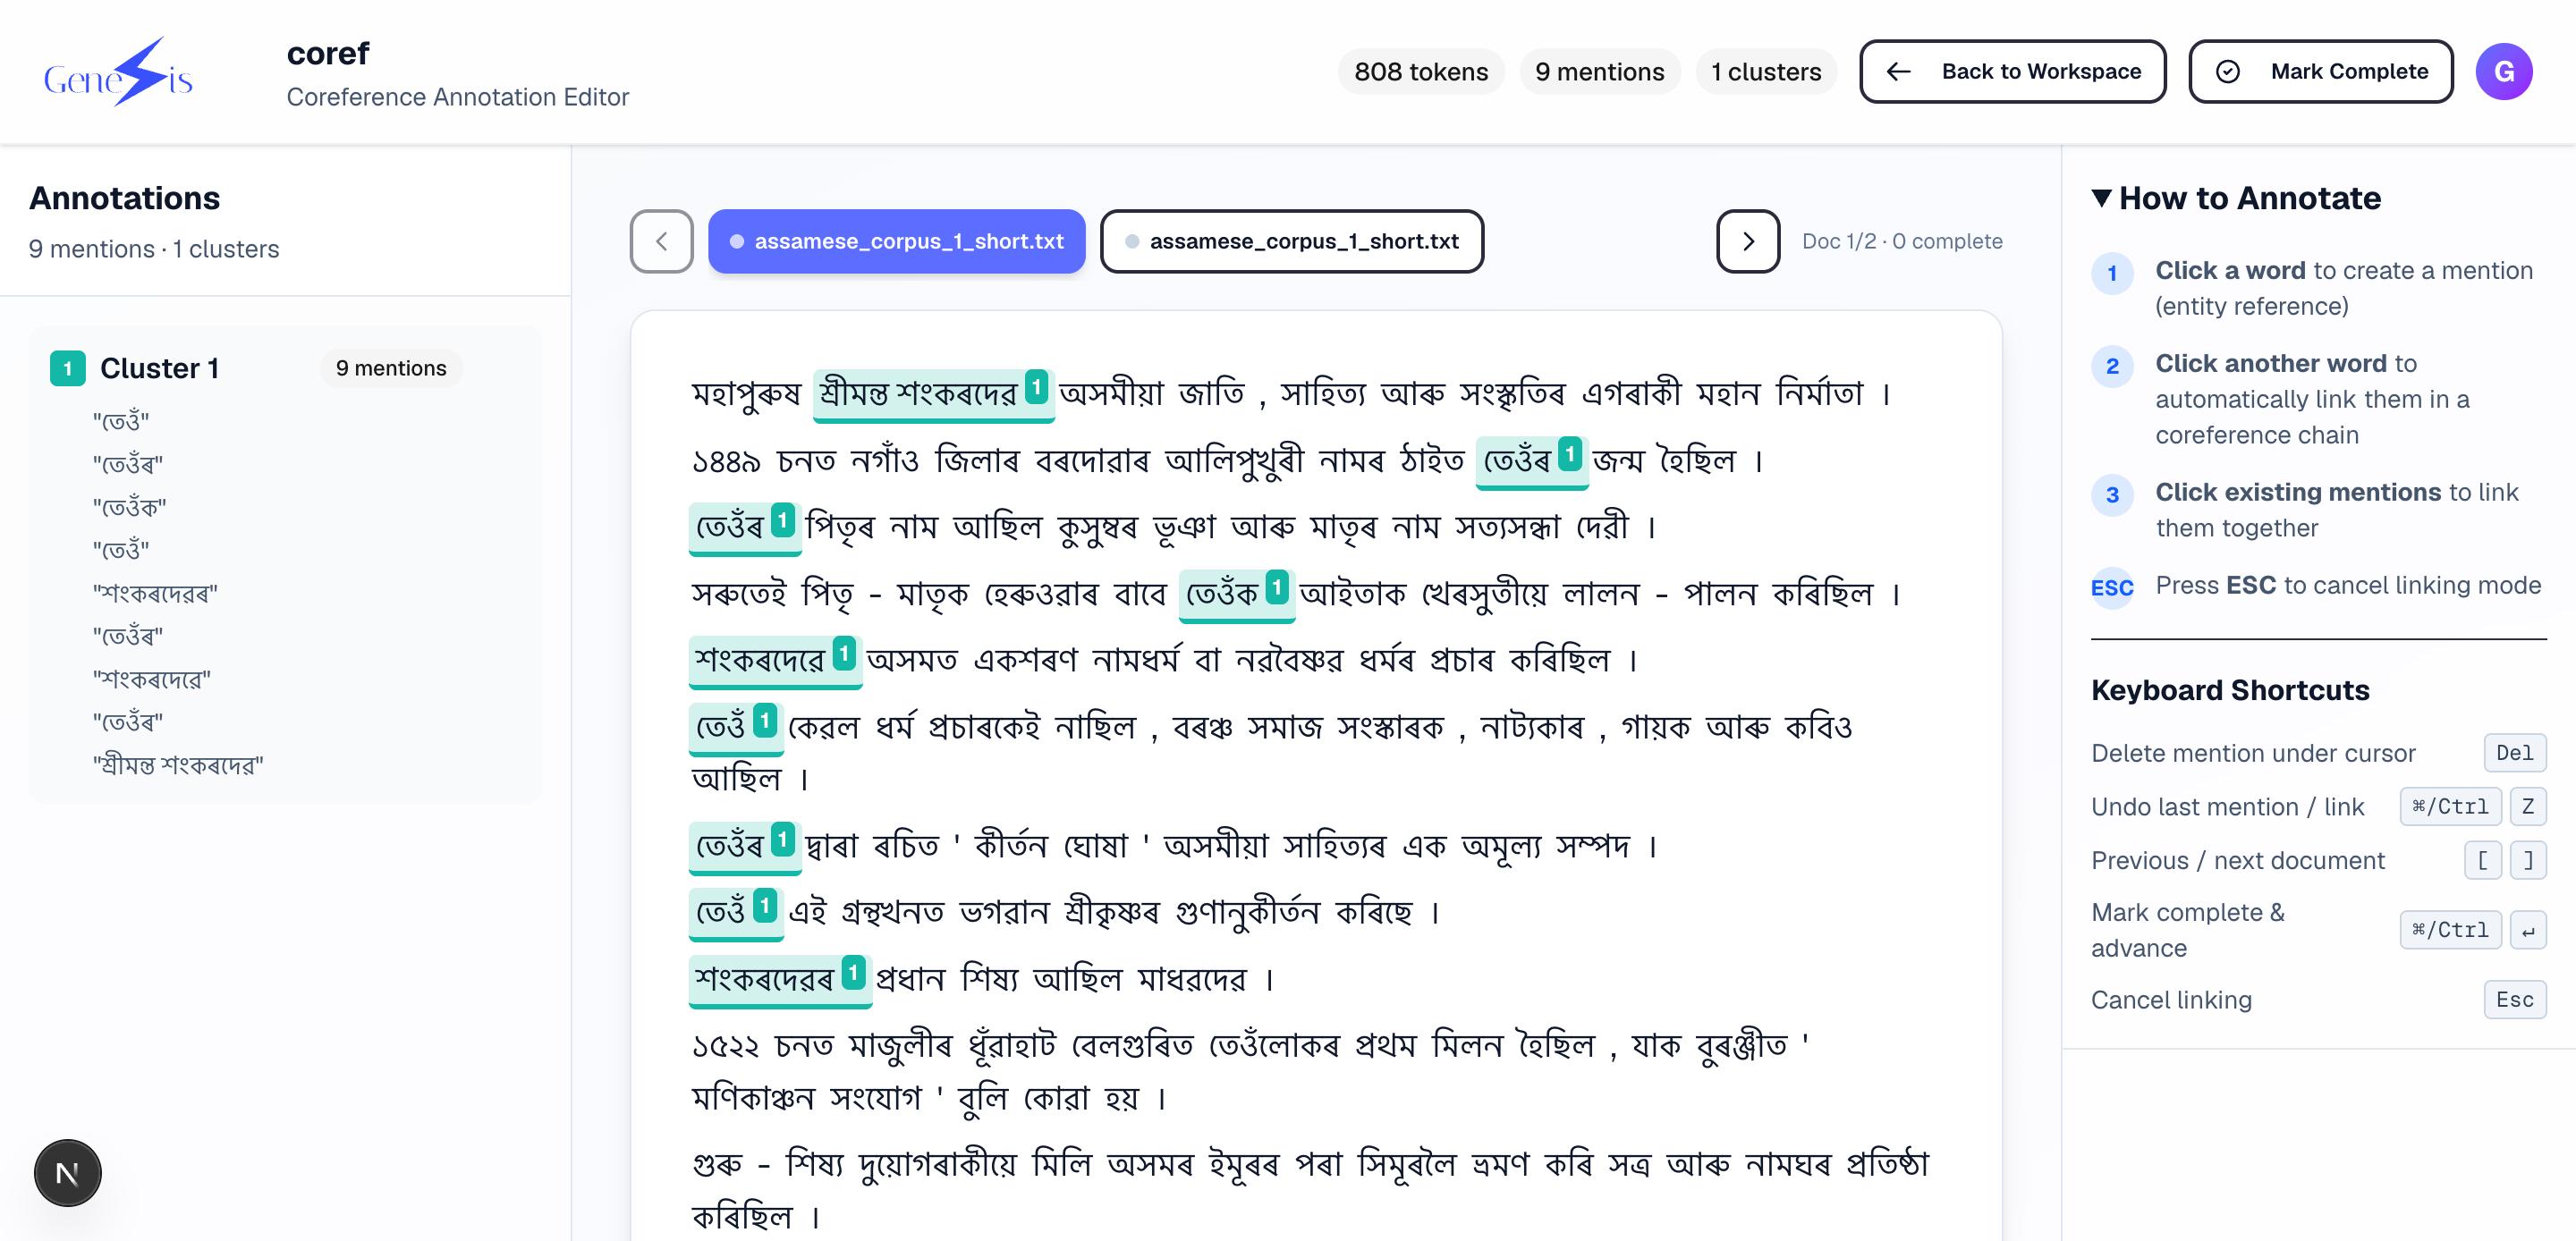
Coreference — select a span of words to create a mention, then add mentions to a colour-coded cluster (all mentions in a cluster refer to the same thing). Clusters can be merged if you later realise two refer to the same entity.
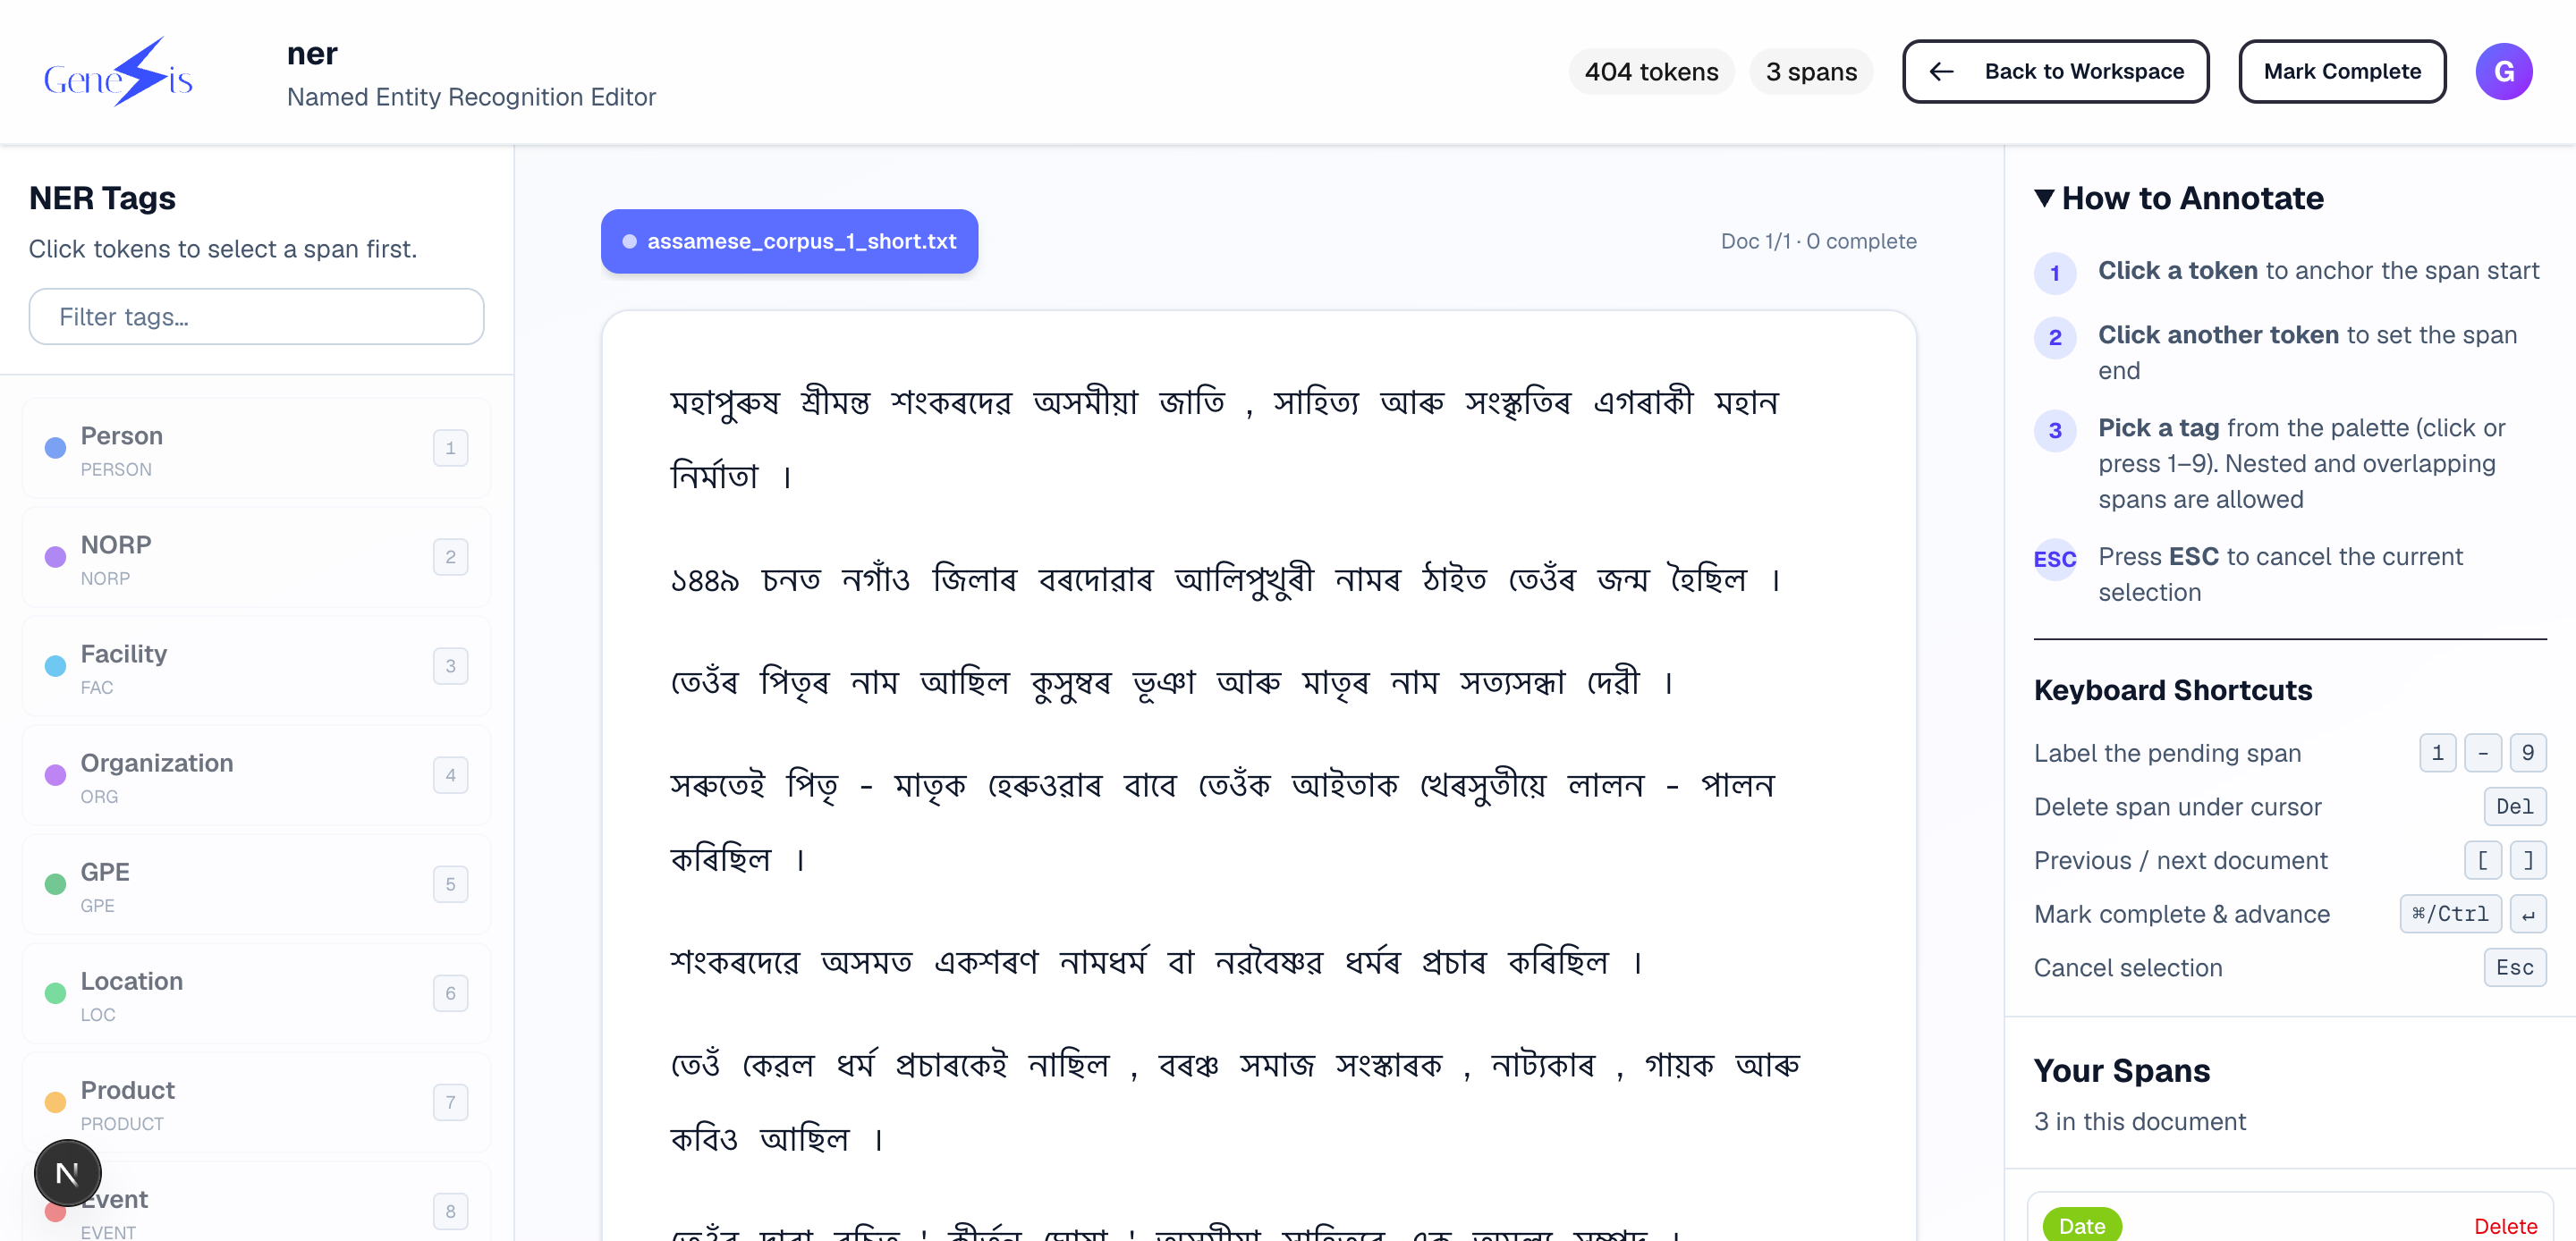
NER — select a span and pick an entity label; the span is highlighted in the label's colour.
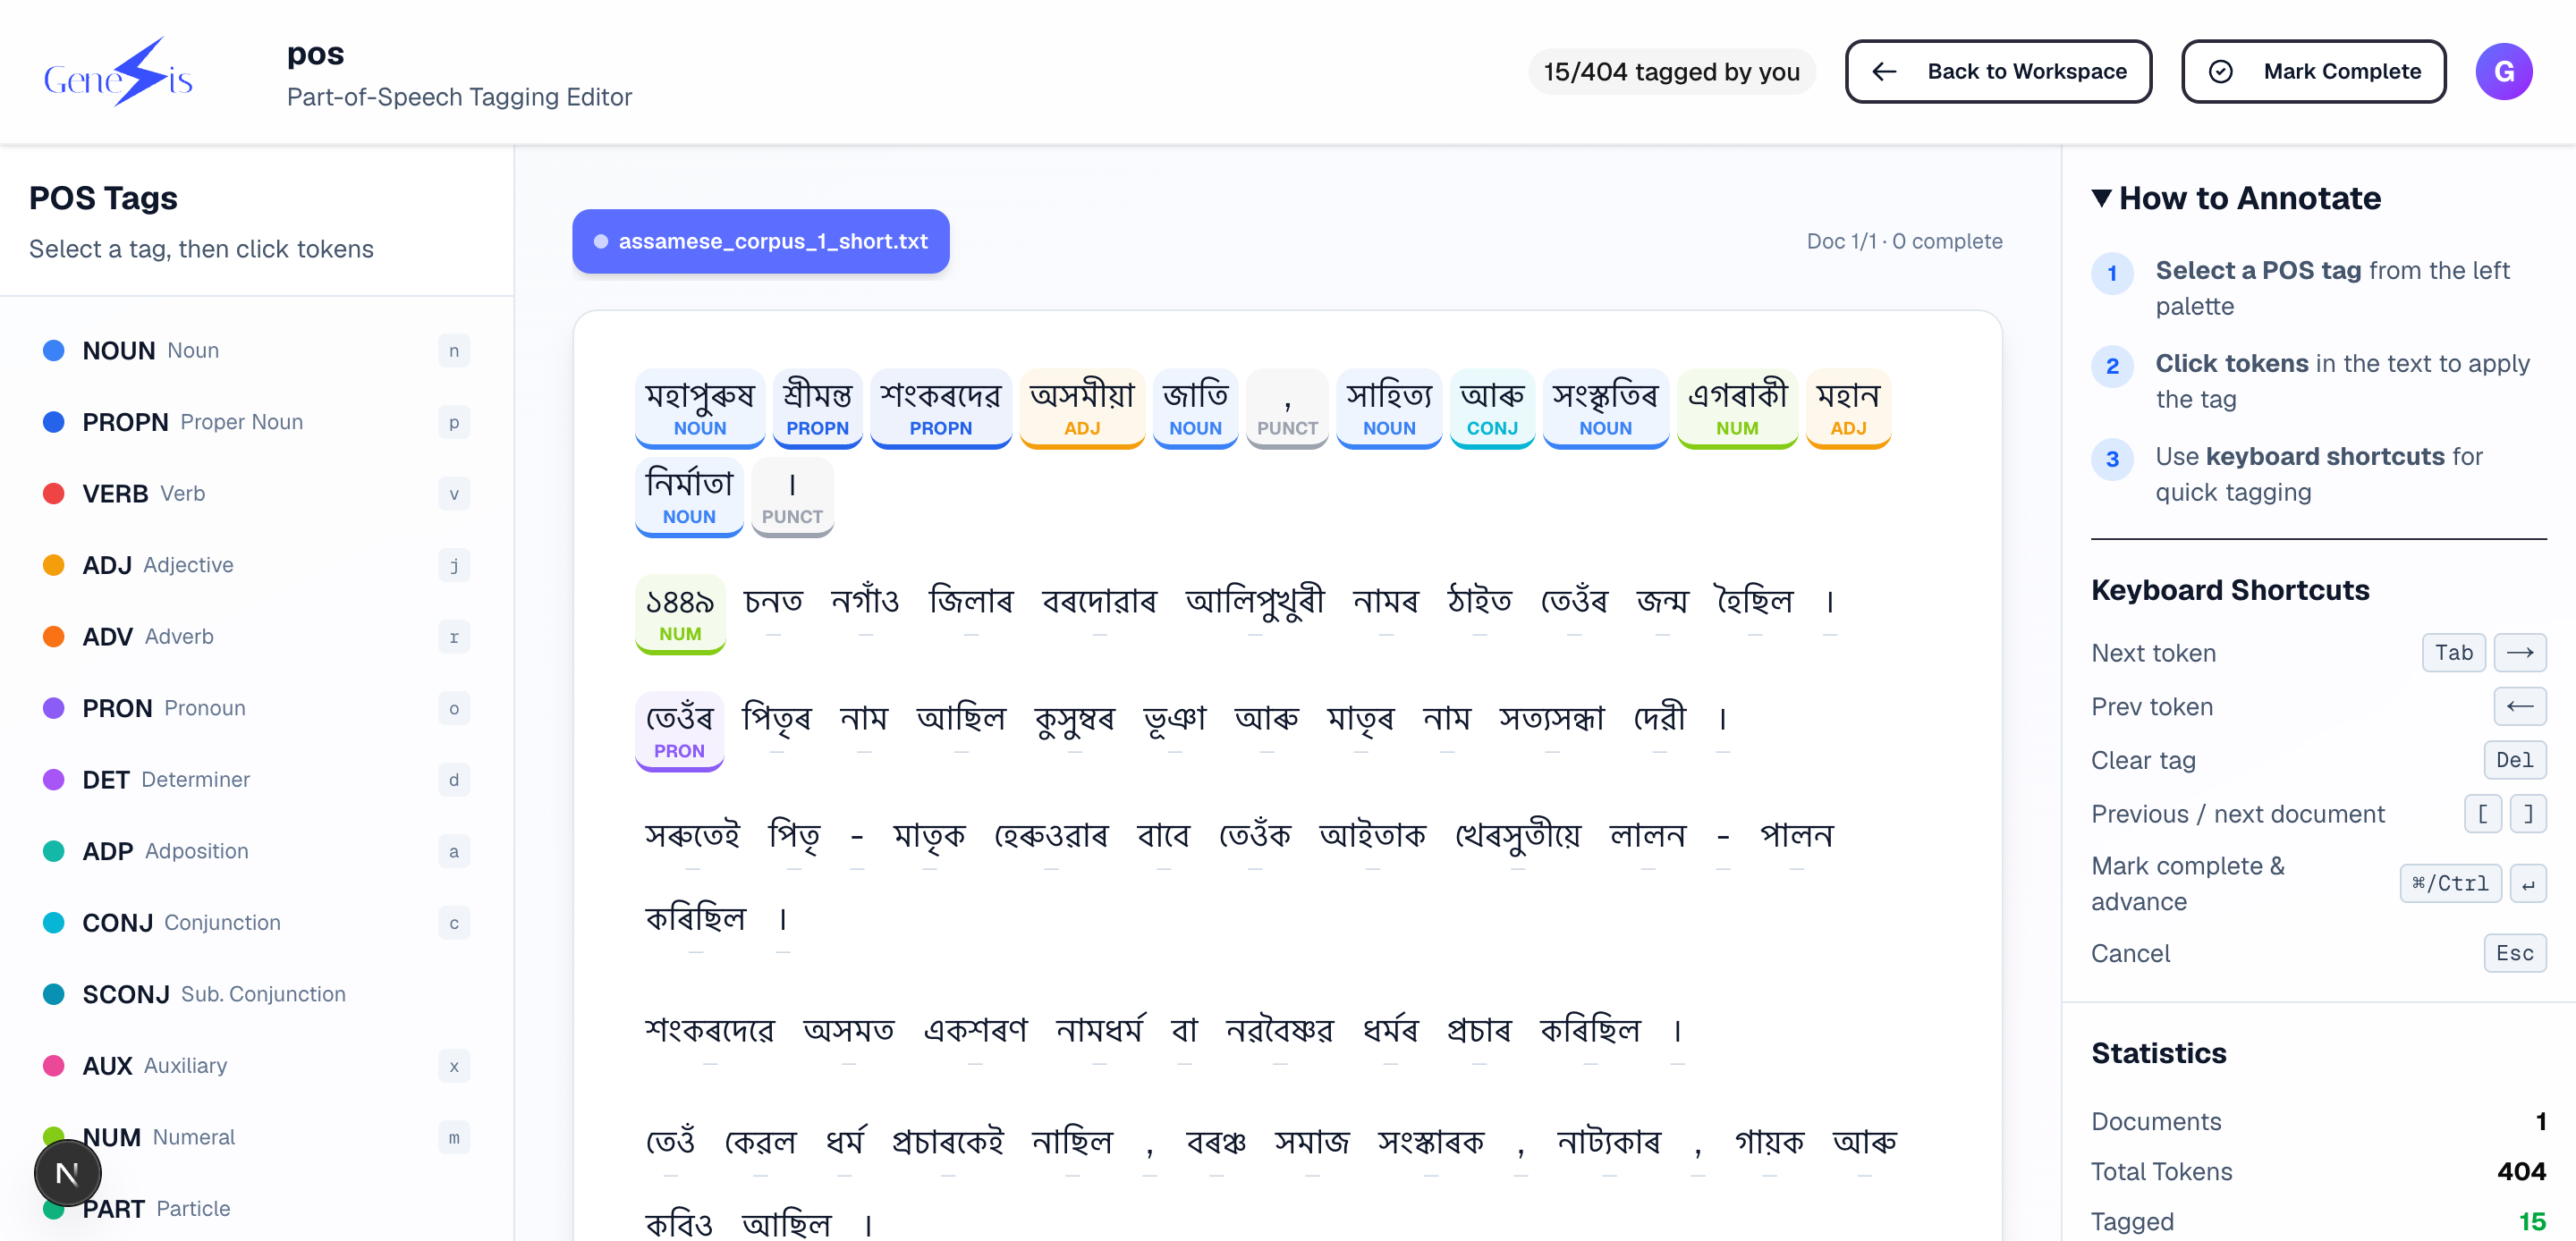
POS — move word by word (keyboard-first) assigning a part-of-speech tag from the workspace tag set.
WSD — for each ambiguous word, choose the intended sense from the sense inventory.
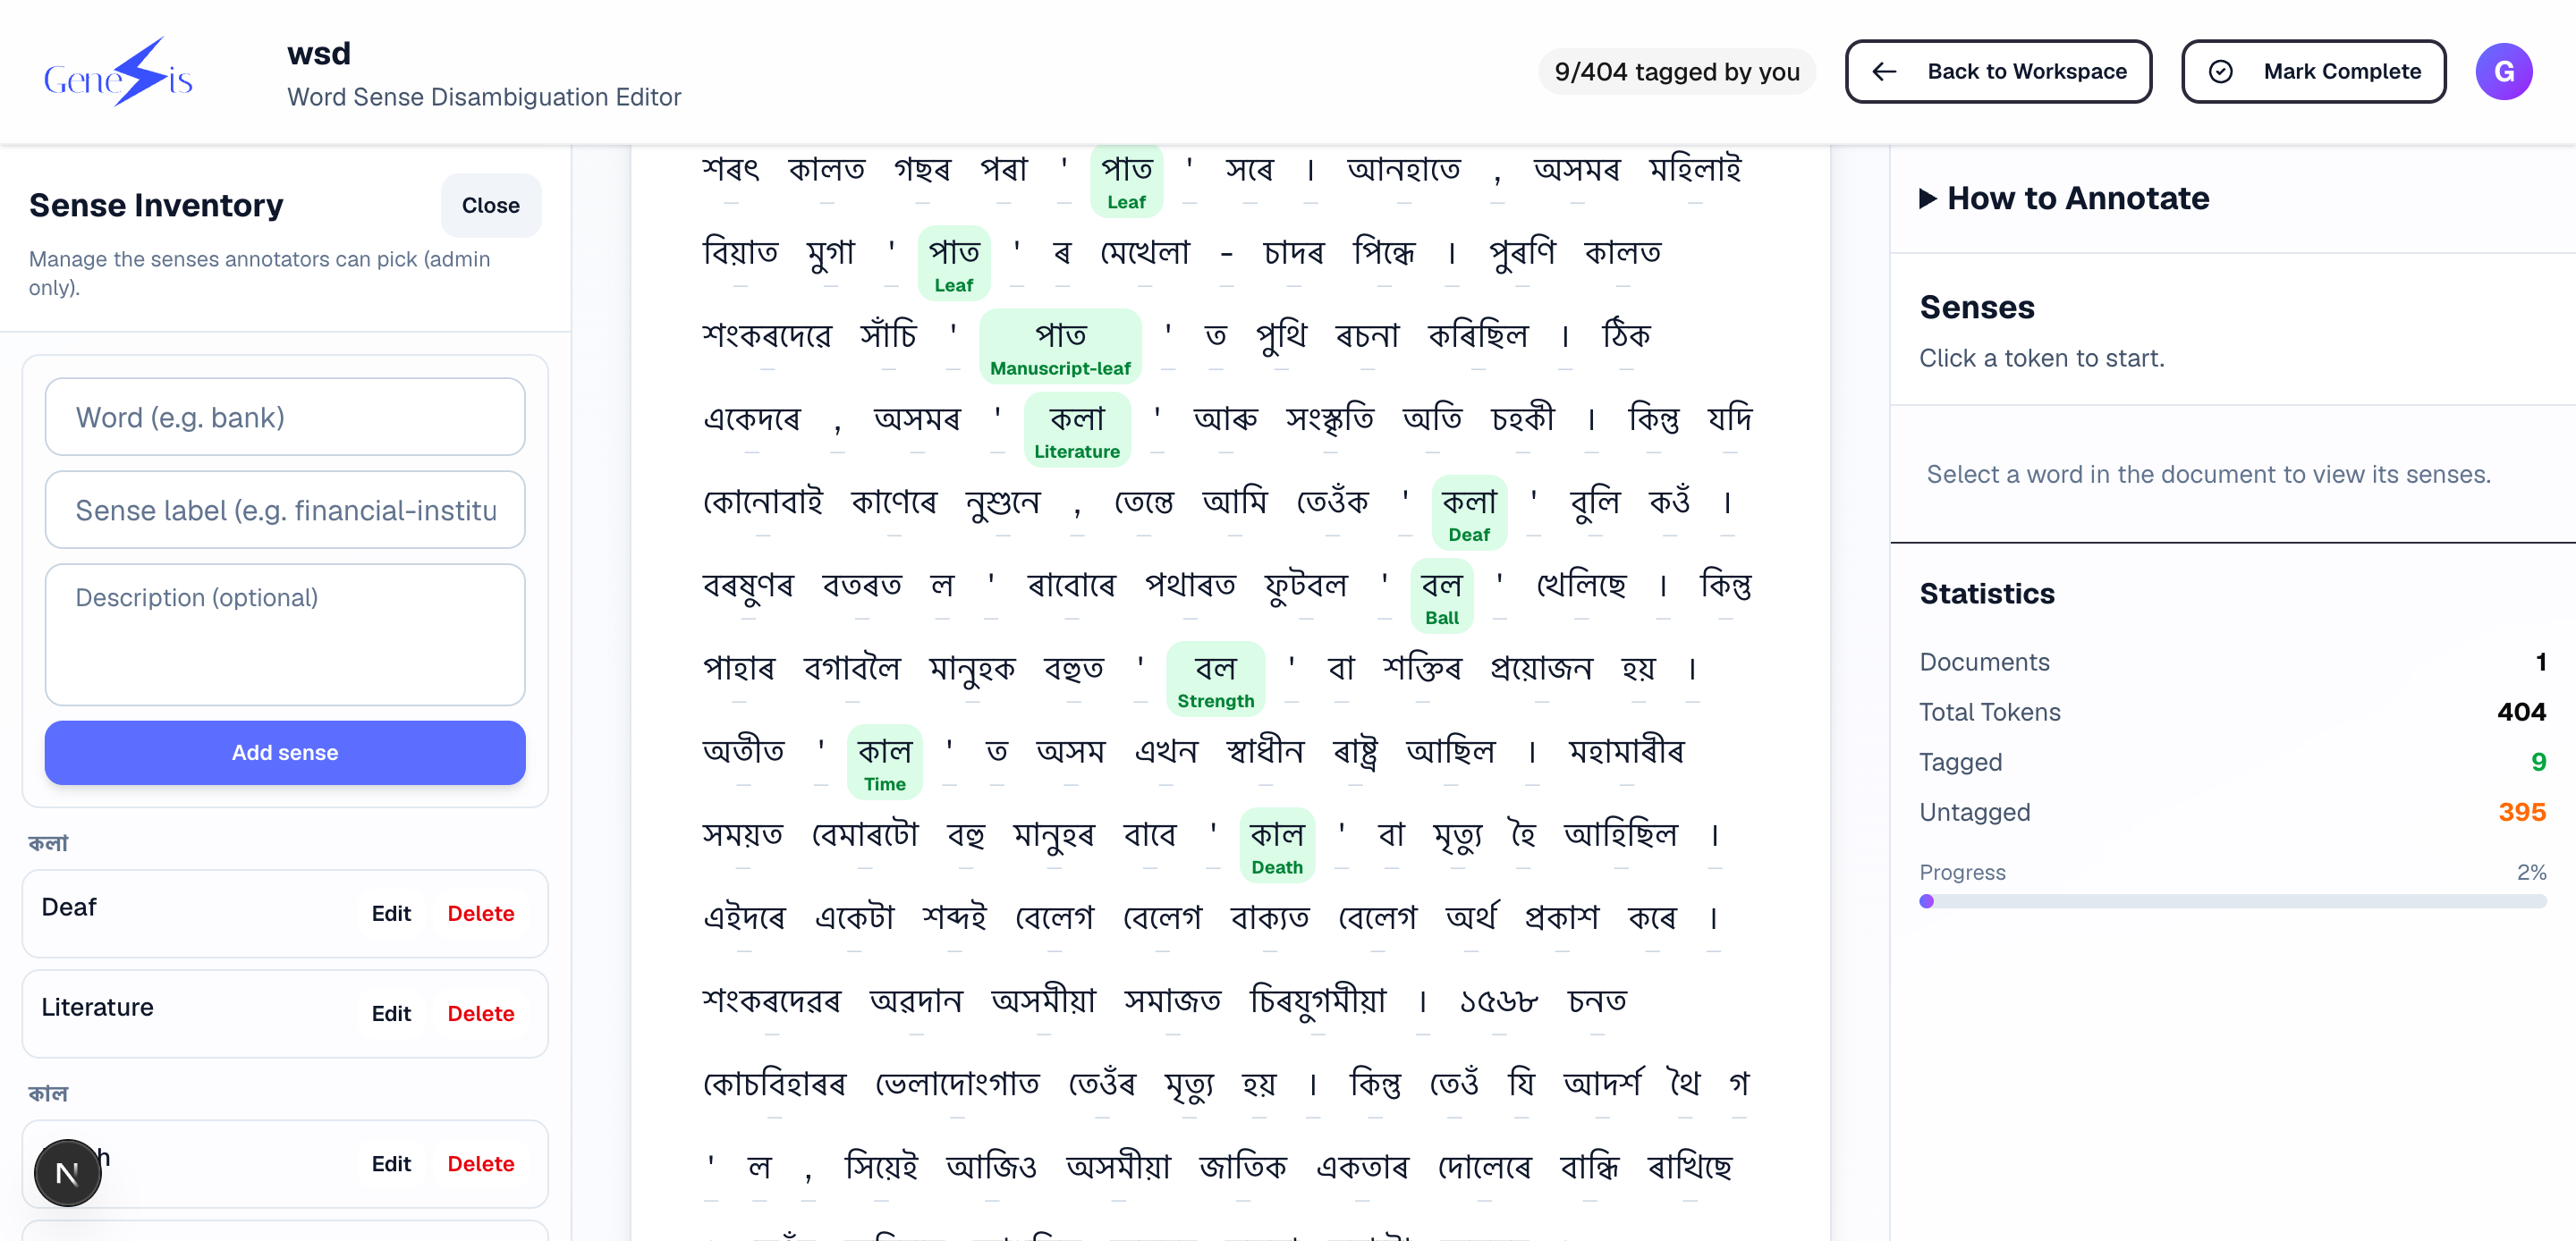
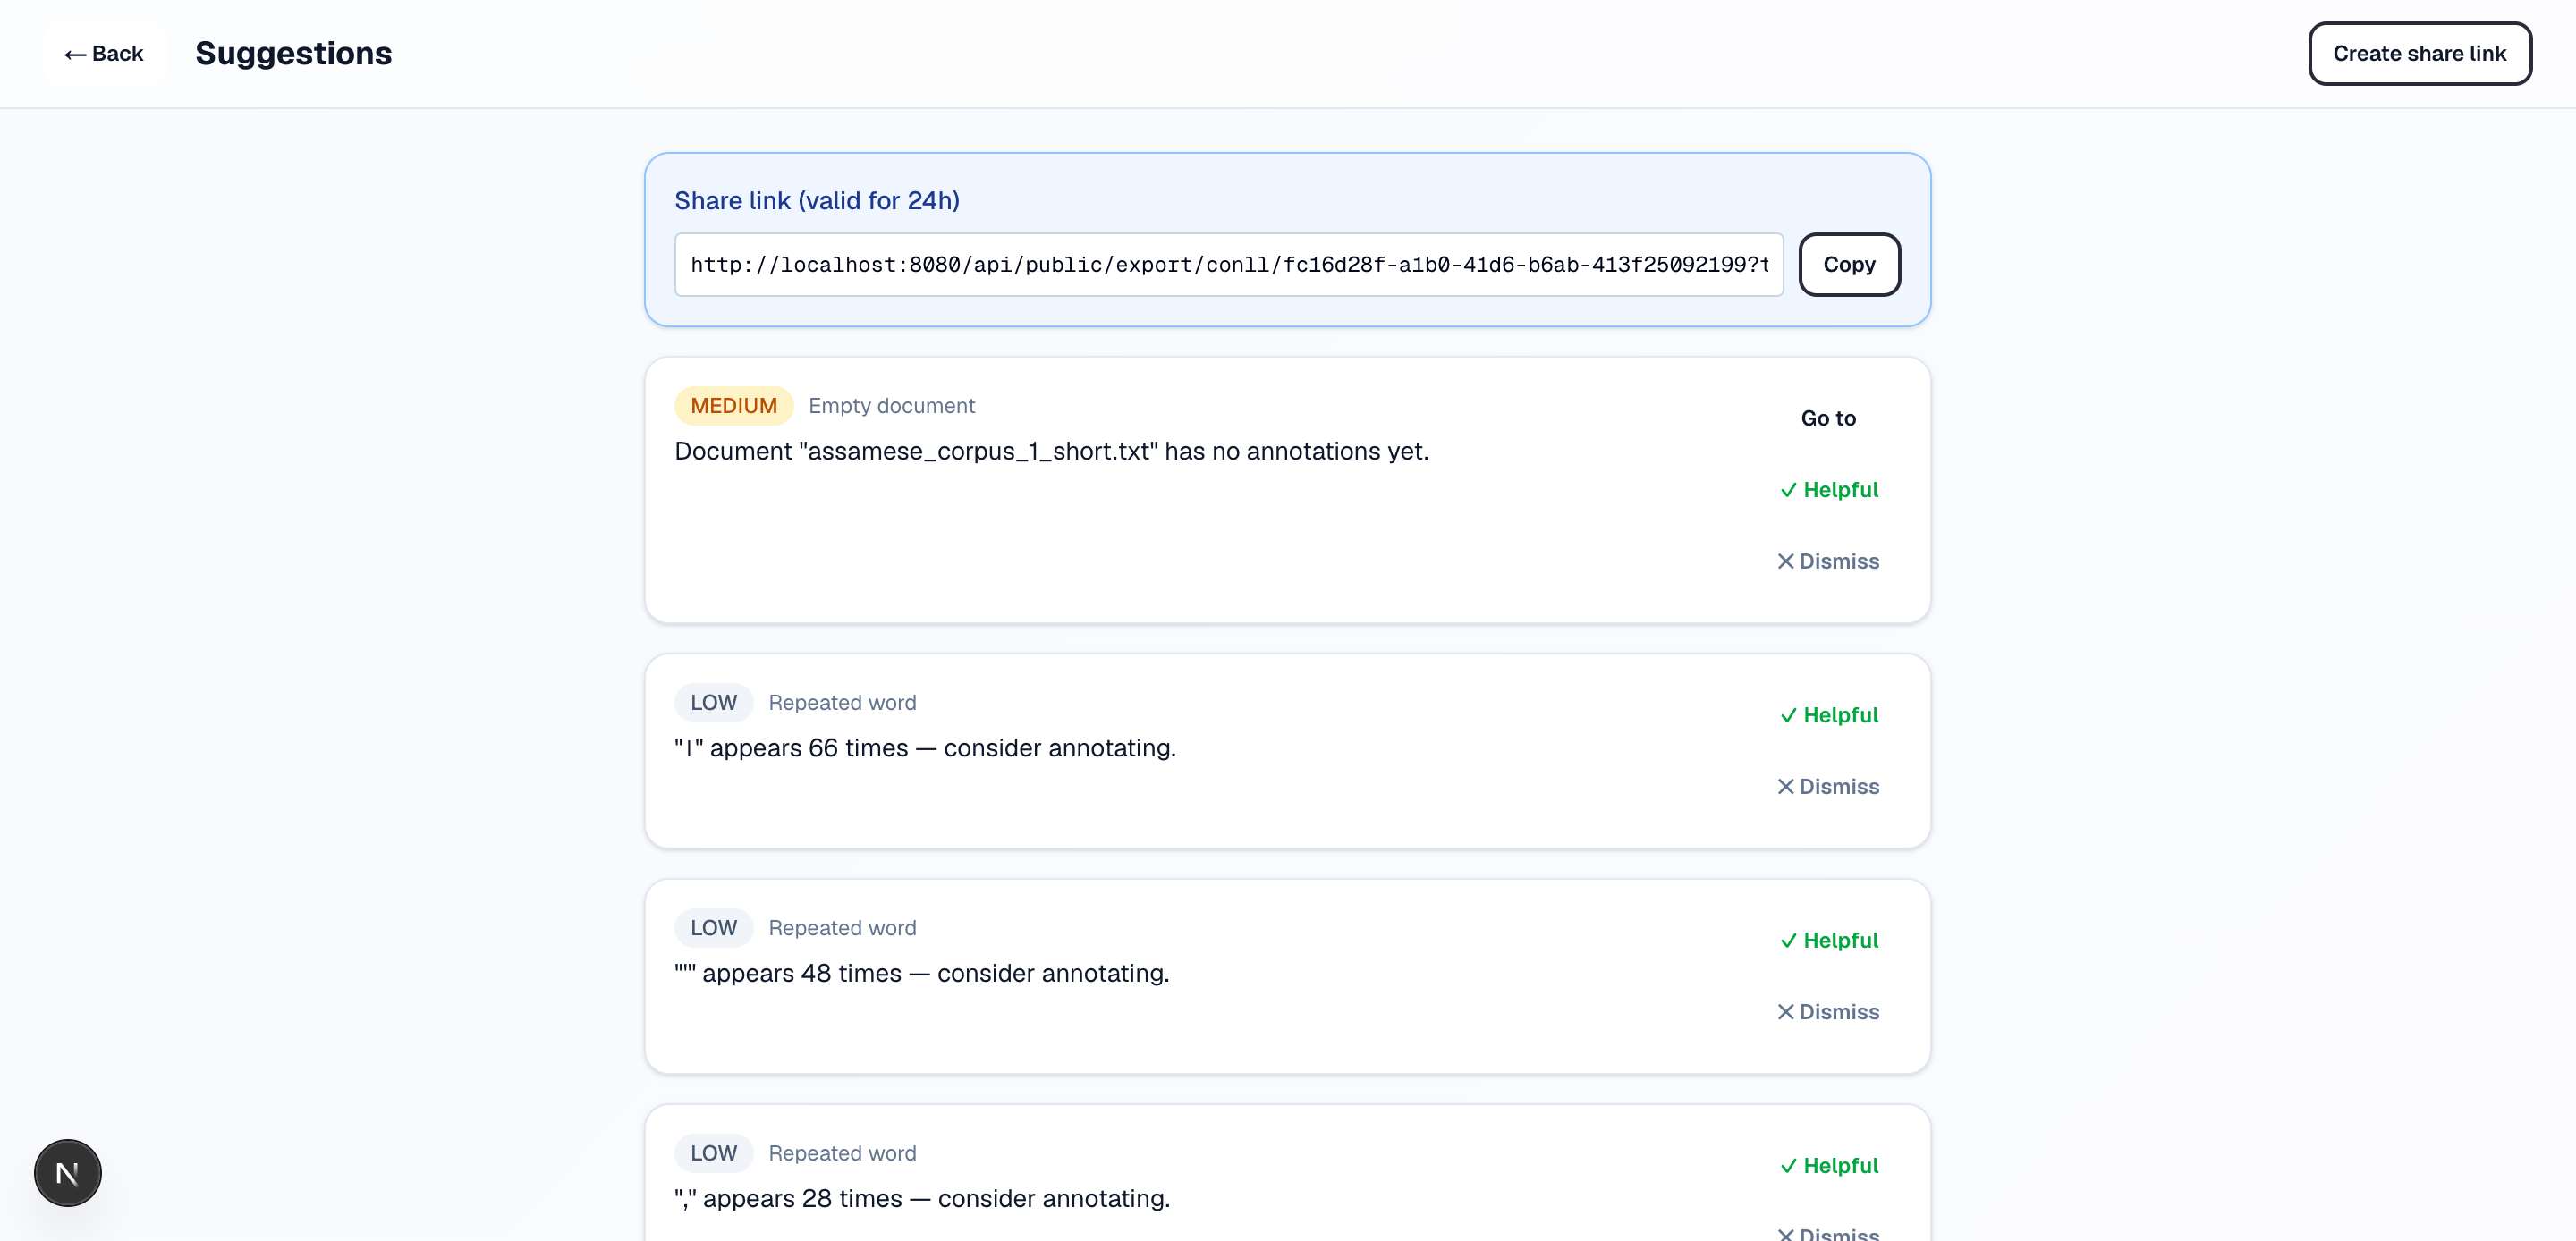
5. Recommendations
Genesis suggests likely annotations for you to review. Accept applies the suggestion as a real annotation; Dismiss hides it permanently. Suggestions never change your data on their own.

6. Notifications
The bell in the header collects events that concern you — a document finished processing, someone joined your workspace, and so on.
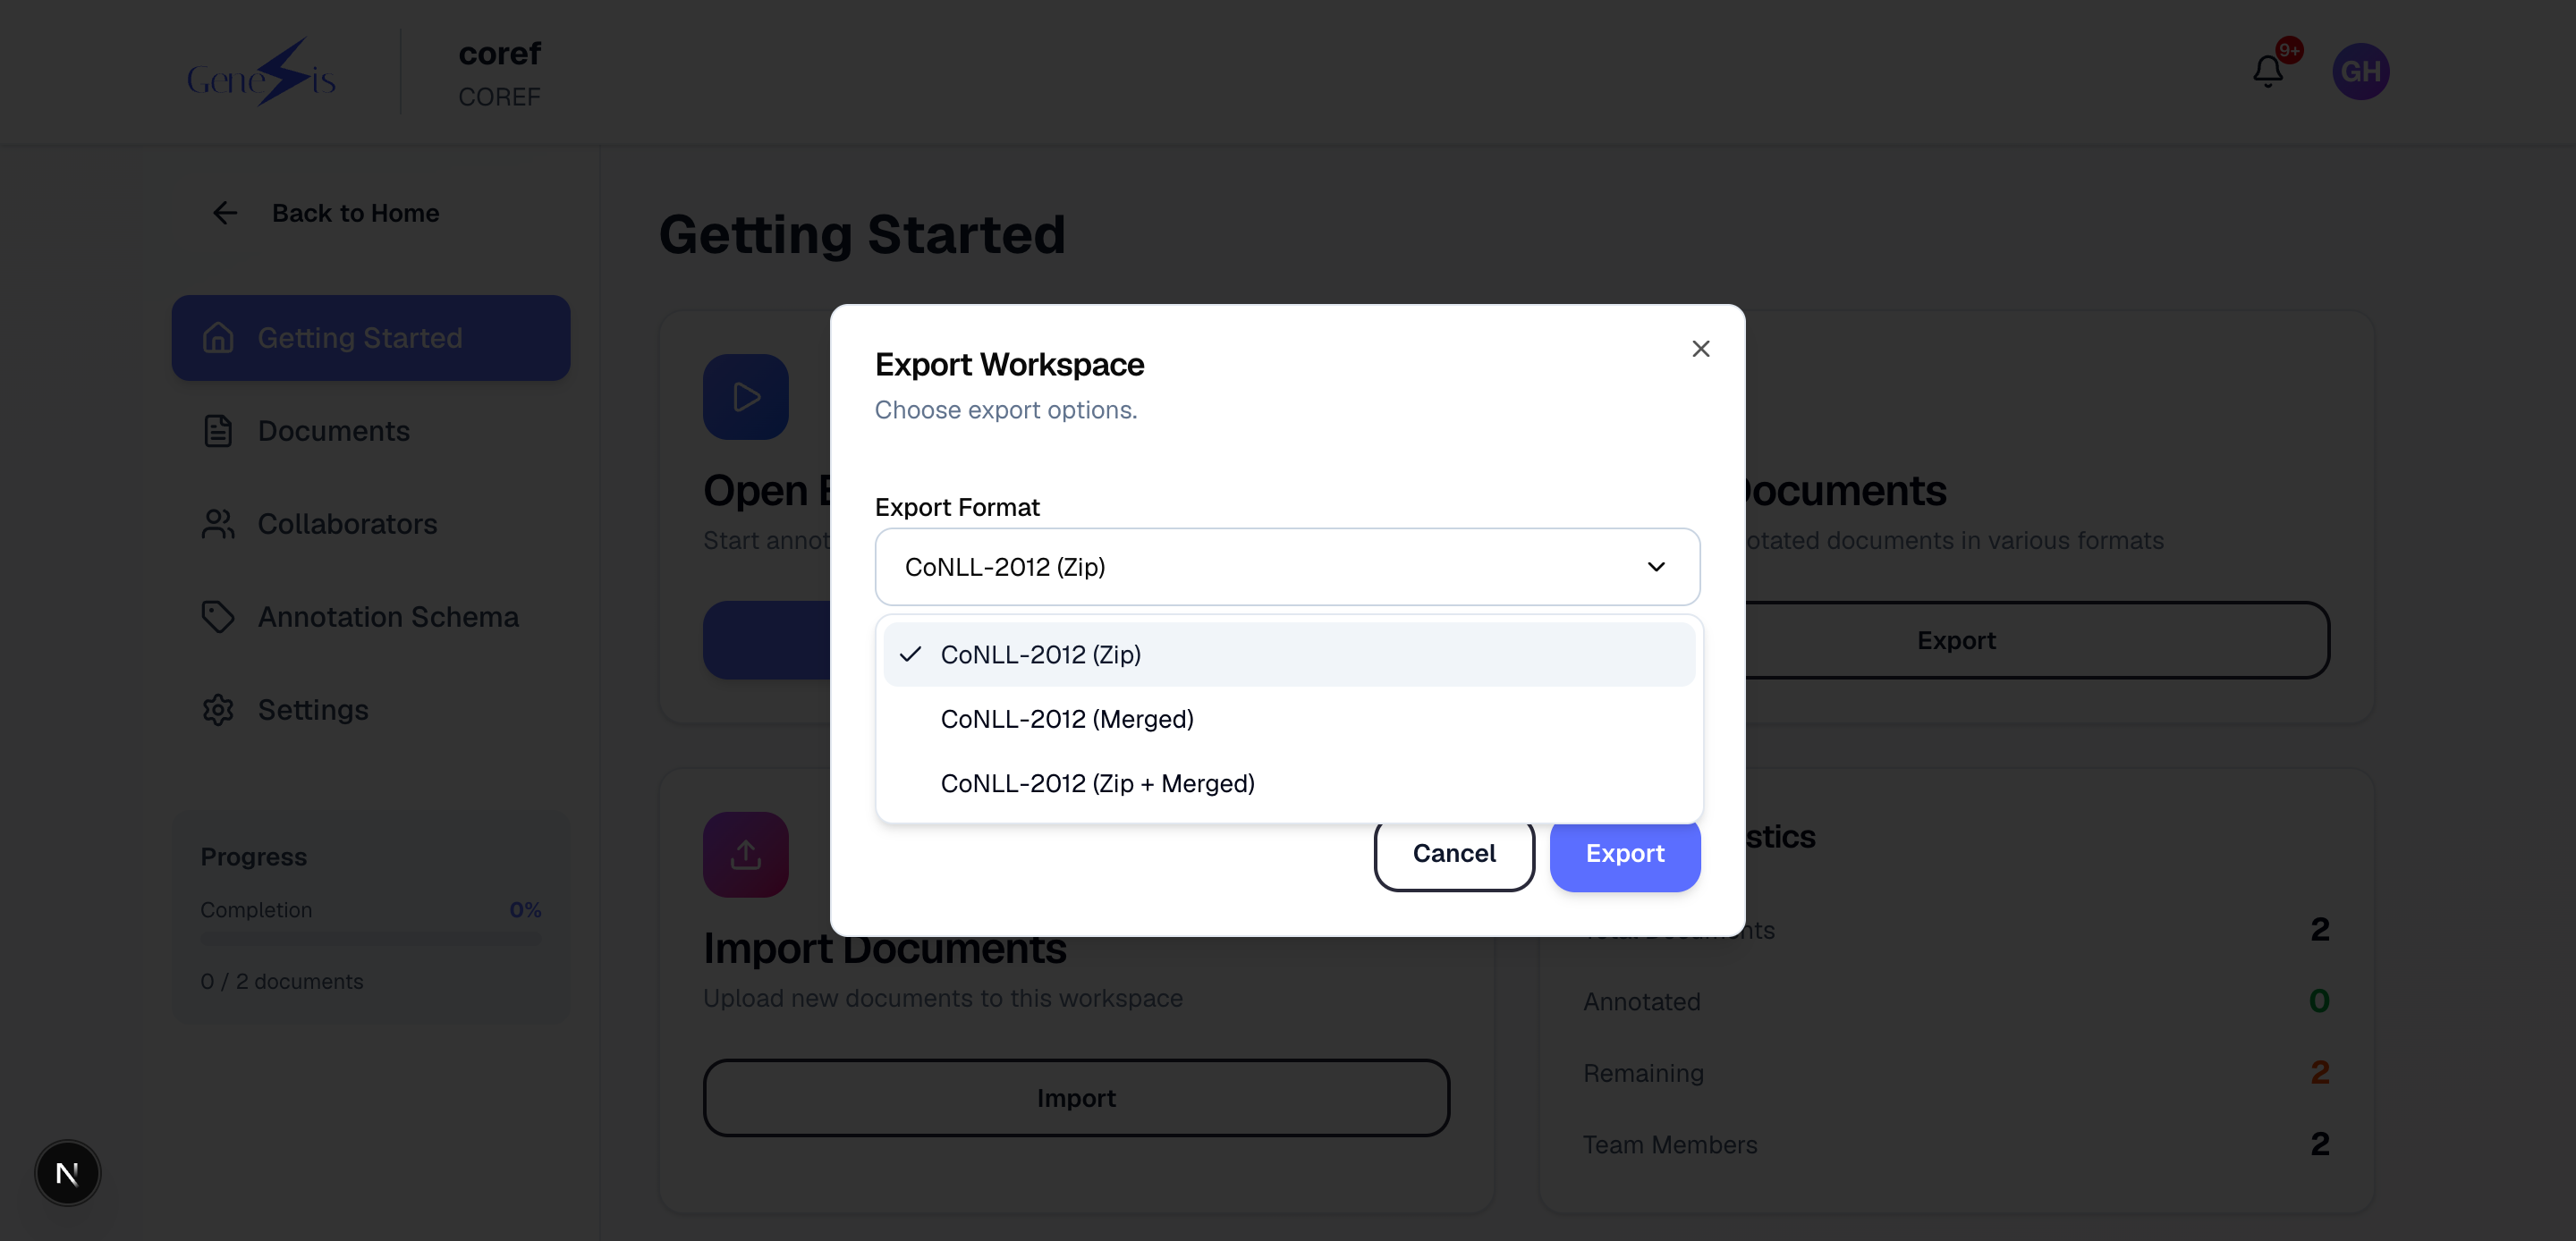
7. Exporting your work
When annotation is done, open the export dialog from the workspace page and download the results — CoNLL-2012 for coreference corpora, CSV for POS — ready for use in NLP research pipelines.
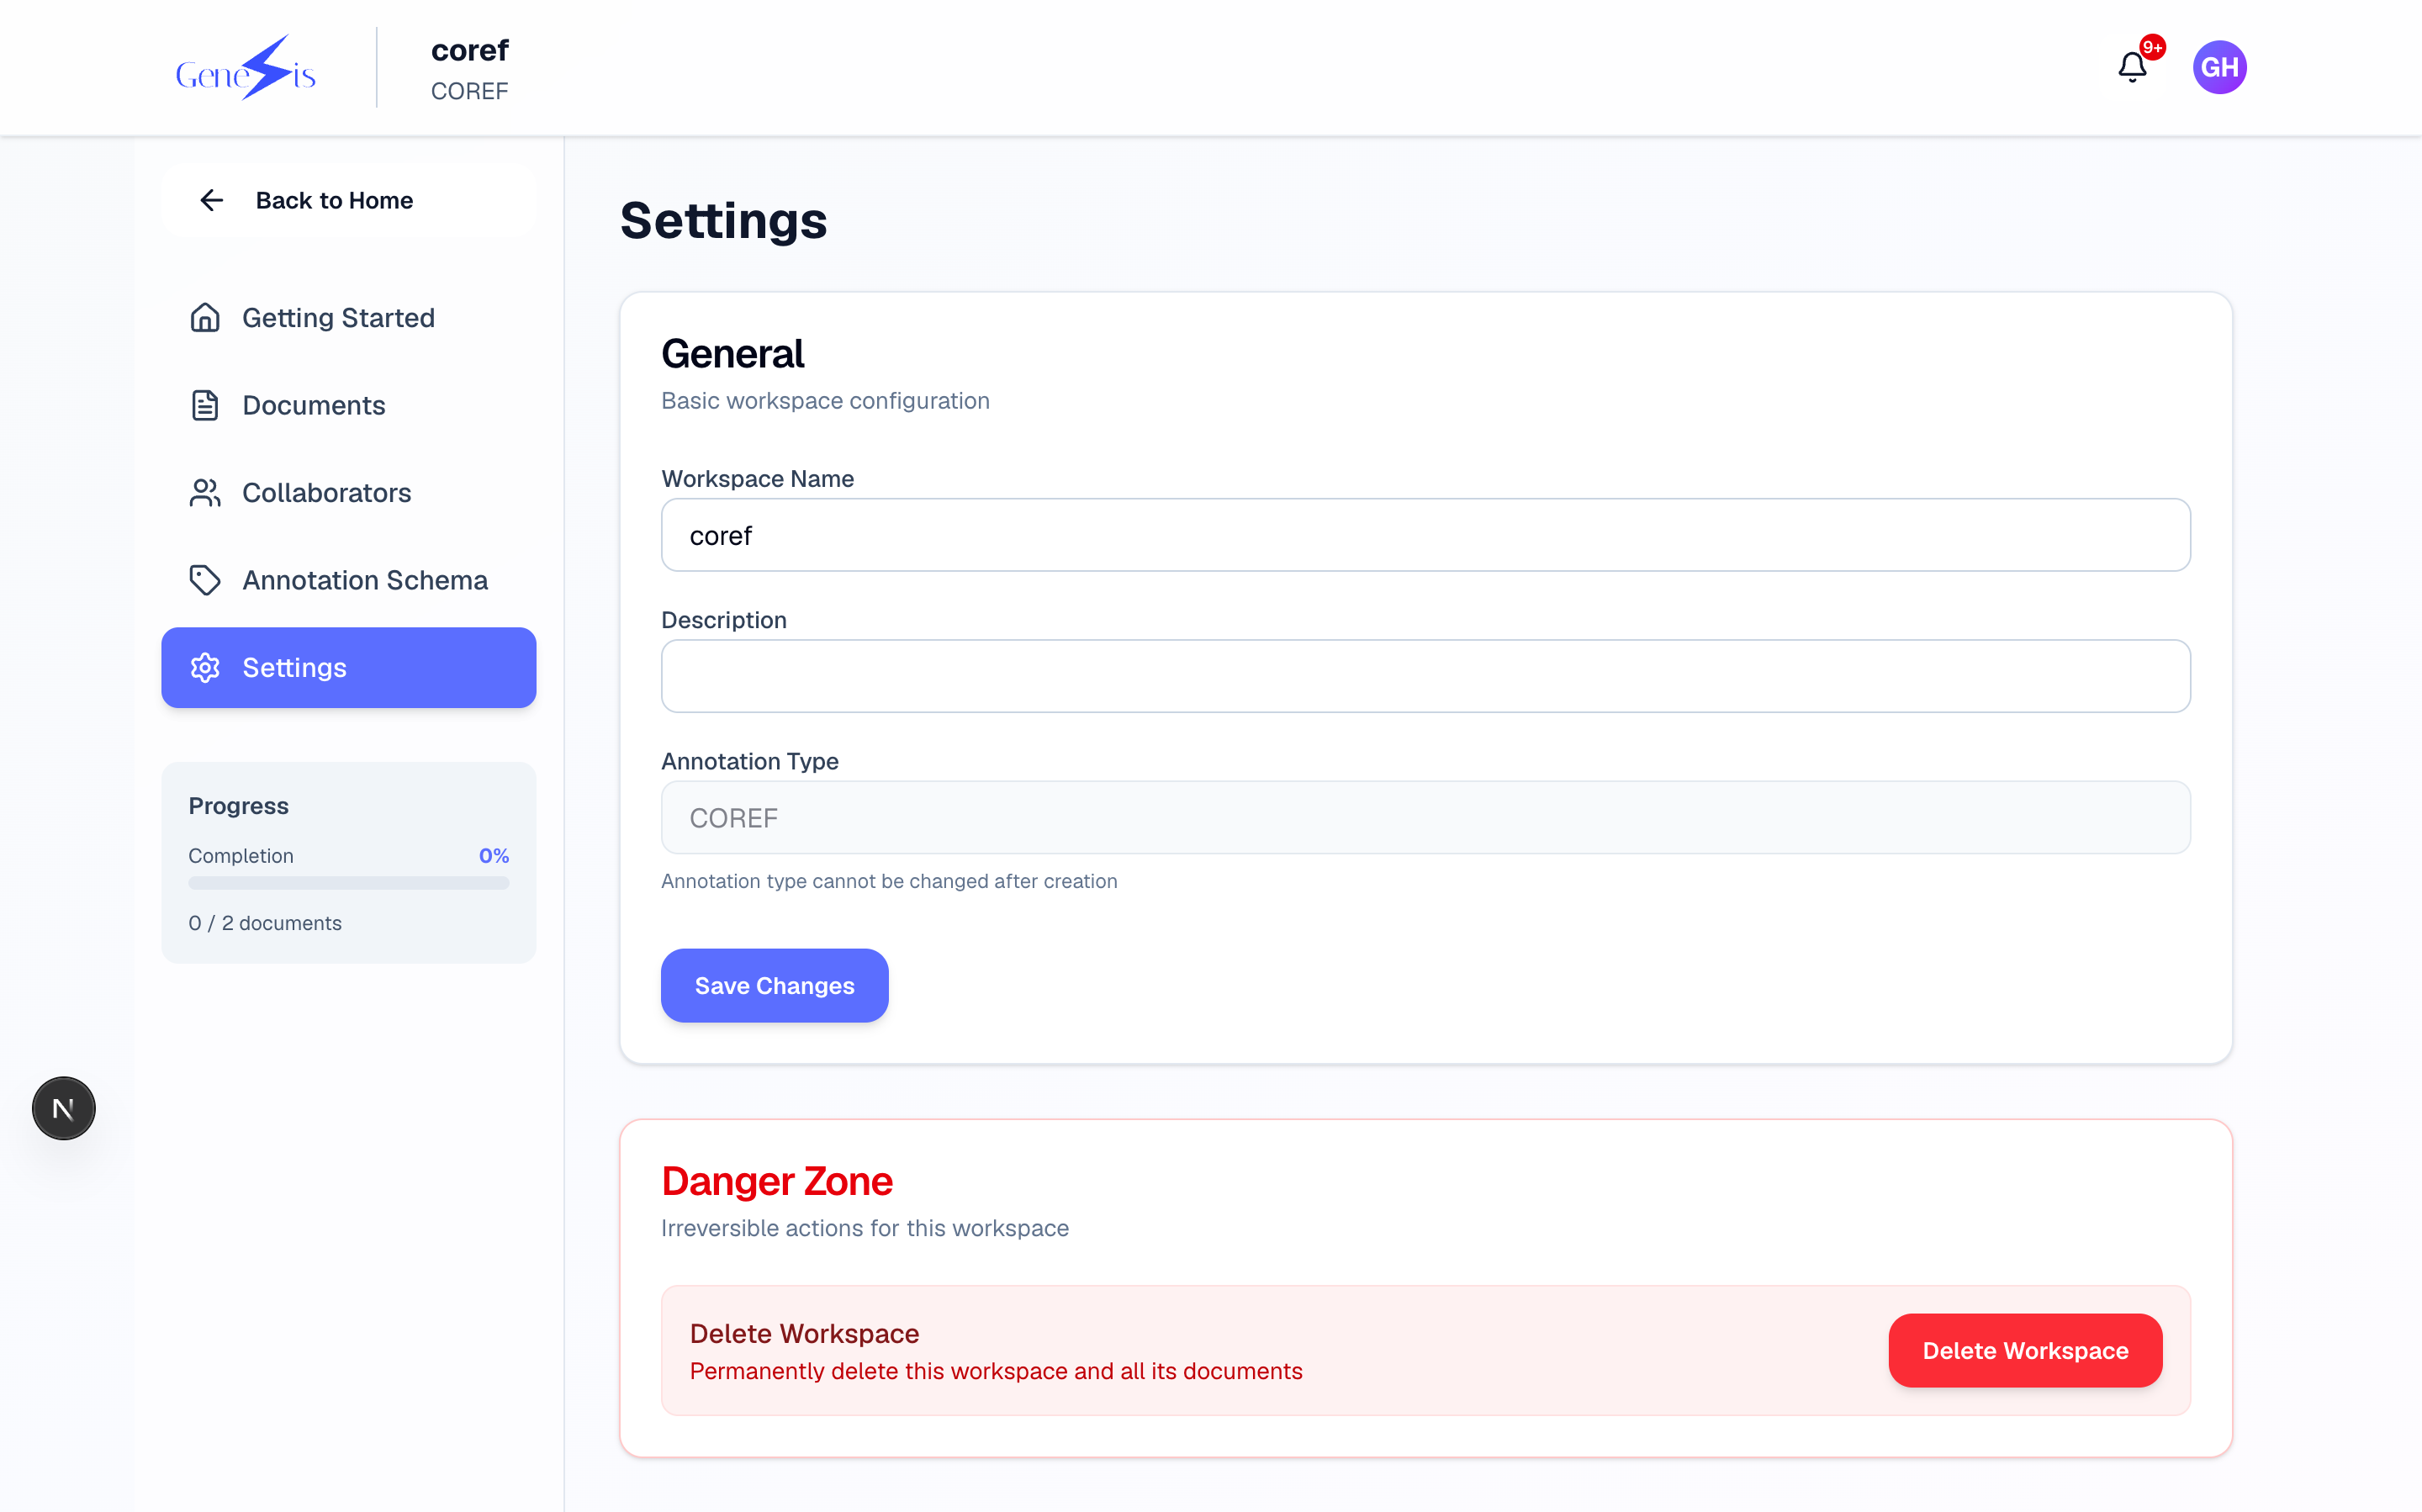
8. Deleting things
Destructive actions (deleting documents or the whole workspace) live in a separate, clearly marked danger zone and ask for confirmation:
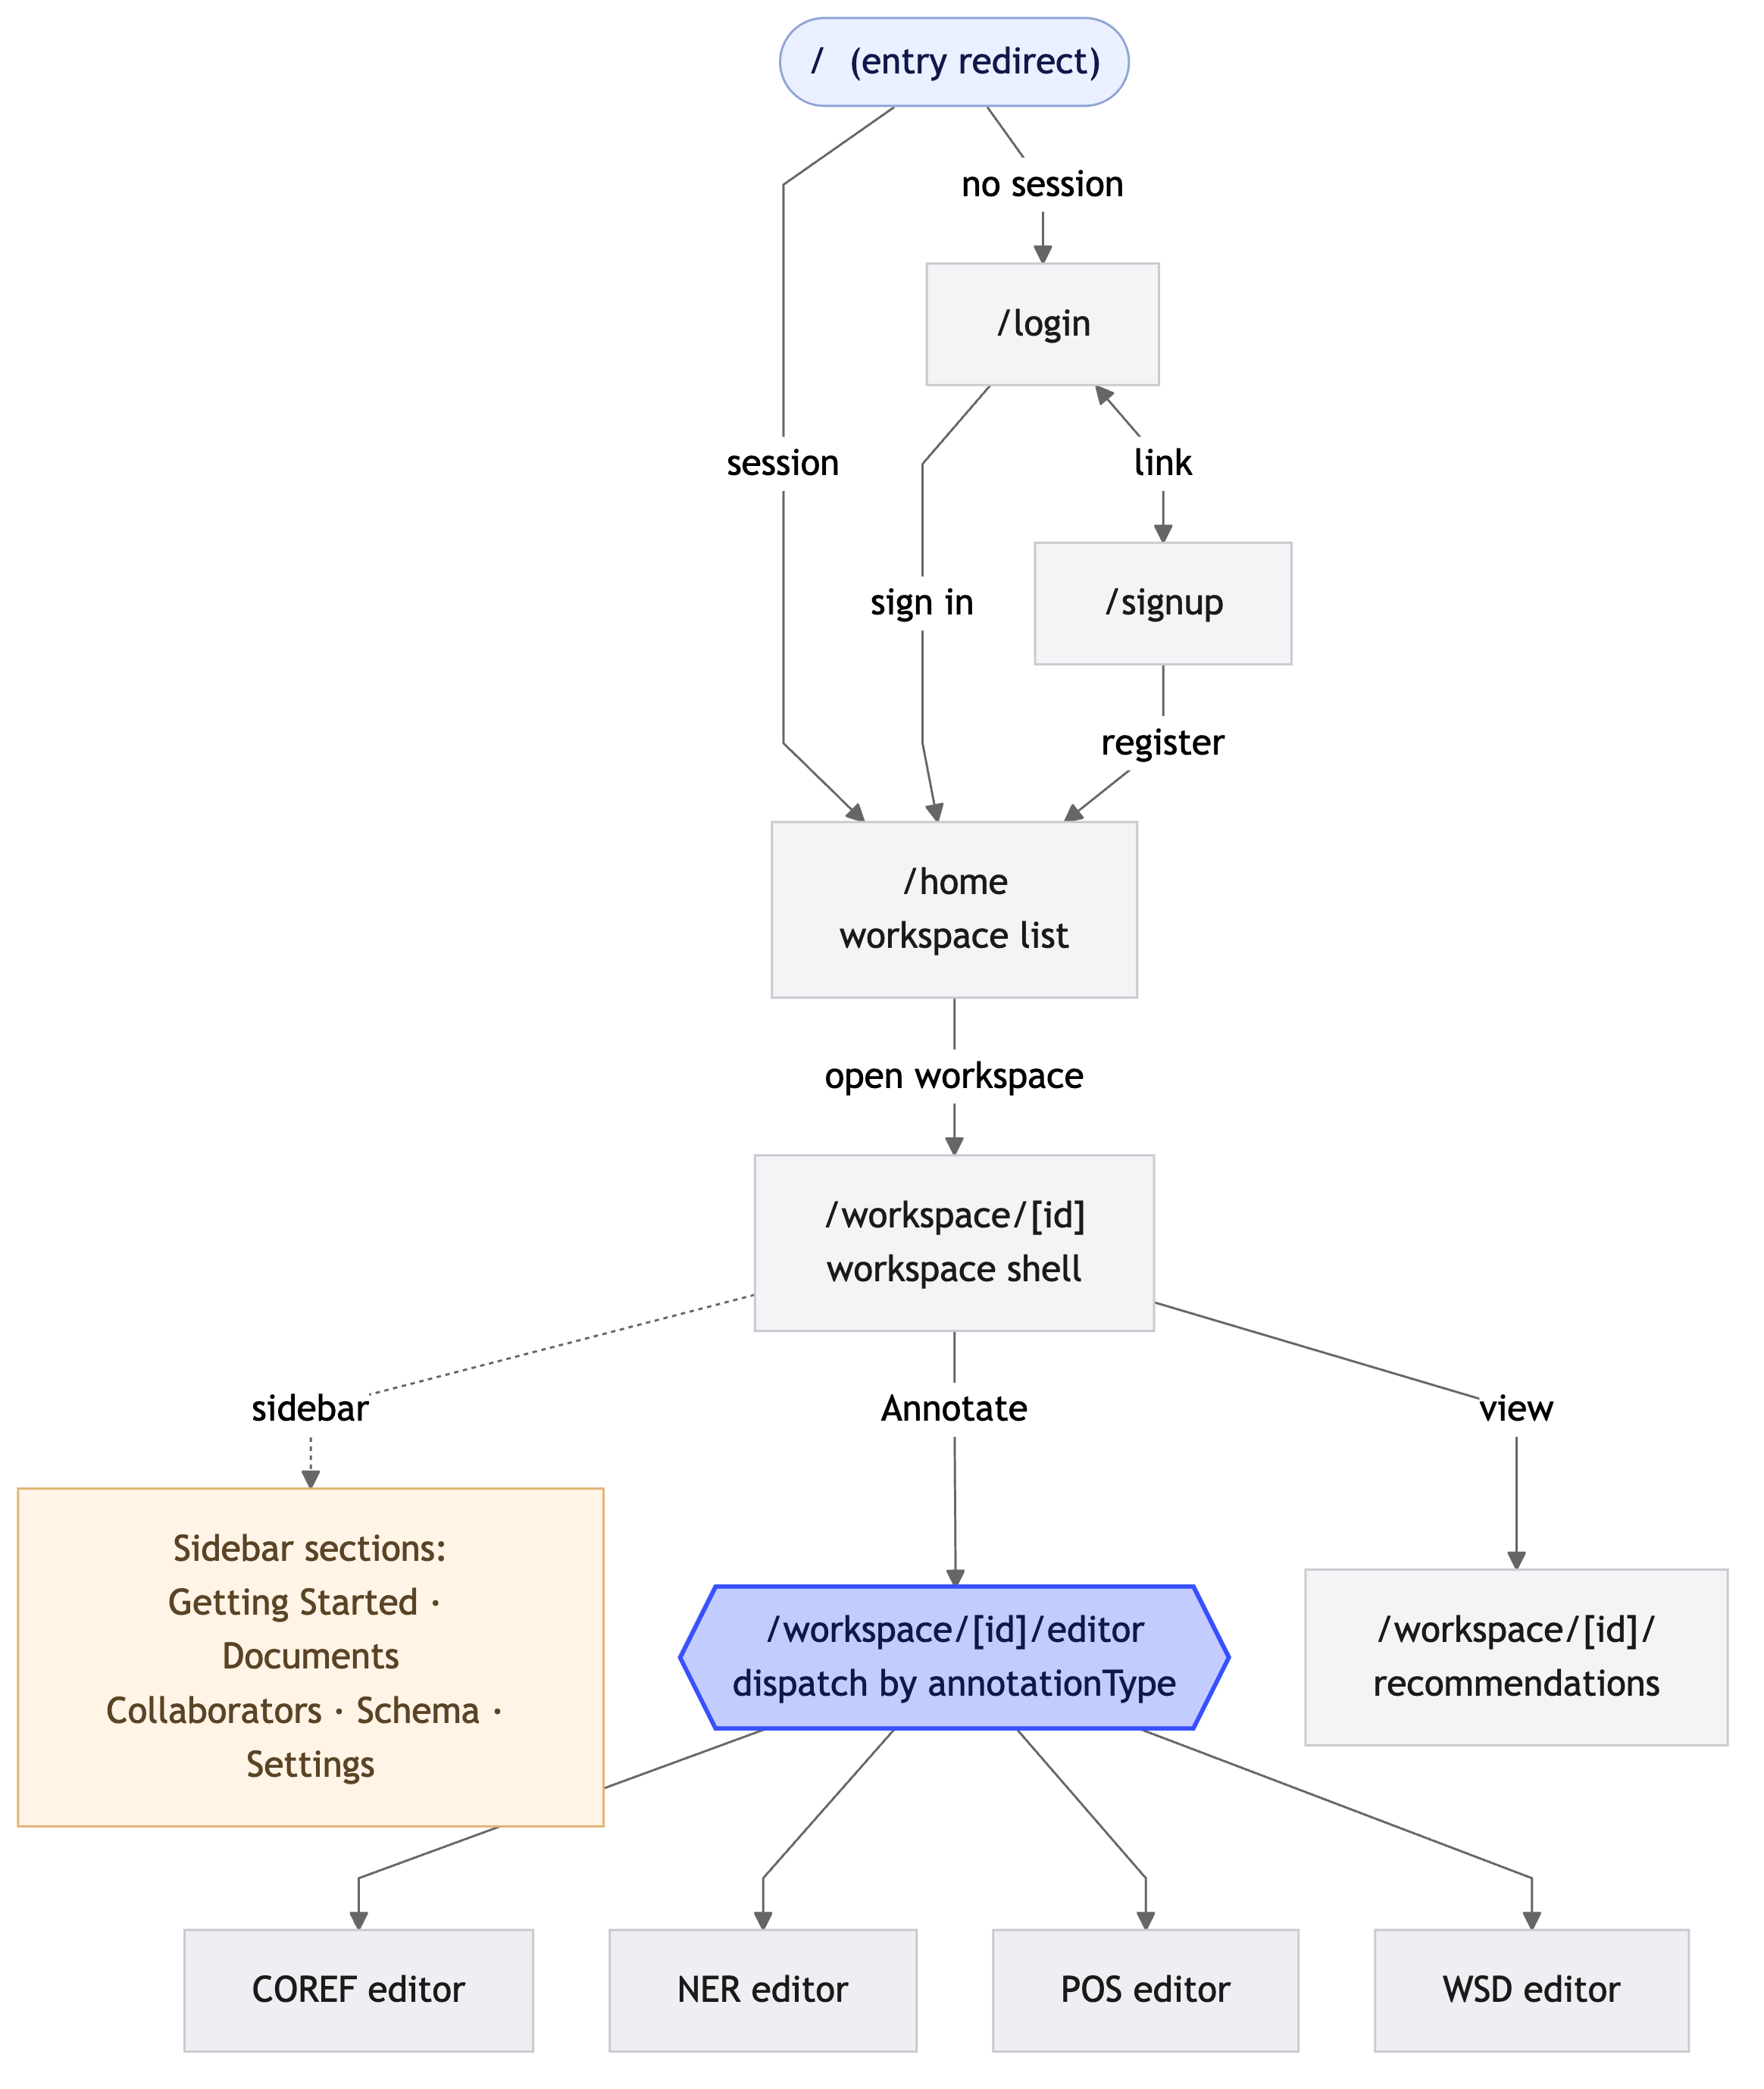
Where everything lives
The full map of screens and how they connect: